February 3, 2011

Trim Painting


Sorry it's been so long since I last posted. We've HAVE been project-ing around here, but there's been nothing to show for it until today.

When we moved in, all of the trim in our house was a dated orangy oak color. It's fine, but not my taste. In every room we've painted, we've painted the trim white. I just like the look of it better. Our living room/ dining room/ entry way/ hallway are all connected, so I've been hesitant to paint the trim in ANY of these rooms, because then I'd have to paint the trim in ALL of them (for cohesiveness sake, of course :) We got some quotes to have it done professionally since this felt like such a big project (and included a massive railing with spindles. Has anyone done this before? I'm intimidated that I'll leave drips all over them). The lowest offer was $1,800. Are you kidding me? Yikes.

So we're doing it ourselves. At least, the trim. We'll probably hire out the railing since I just know I'll botch it if I try myself.

Here's the wonderful before shot:

Can you see I remembered just in the nick of time to even take a before pic? I always forget.

And here's the after:

Not sure why the sunlight looks red. Hmm. Much better, don't you think? I'm excited to tackle the rest of the trim. Okay, not excited about the prepping/painting part, but the look-it's-all-done part. We started with the hallway and will paint room by room so the entire main living area isn't in upheaval until mid May.


This project wasn't expensive, but took a lot of time. Here's what you need to paint your trim (well!):
  • oil-based primer
  • white latex paint
  • a good quality paint brush
  • fine grit sanding block
  • old rags
  • paintable caulk
  • painter's tape
  • dry wall repair
  • kitchen scraper
  • PATIENCE!
Lightly sand the trim to give the primer something to grip to, and then wipe it down to get rid of all of the dust.

Fill in any nail holes or dents in the trim with dry wall repair, let dry, and sand.

Tape of the walls and the floor. In order to help with trim paint not leaking onto your walls, press the edge of a plastic kitchen scraper into the corner of where the paint and the trim meet. This sort of "seals the edge."

Next, fill in any (and I mean ANY, big or small) cracks in the trim, especially in the seams of doorways with paintable caulk. If there's even a small (as in hairline) gap between the wall and the trim, or between pieces of wood in the door frame) fill them in. I didn't do for the other rooms I've done, and am already regretting it. It makes the paint job look a lot more professional.

The last step of prep is to put a small layer of caulk between the edge of the tape and the trim. Once the caulk is dry, it will create a barrier between the paint and the wall and you'll literally have NO drips/leak throughs. It's rather unbelievable. If you do nothing else, do this. That seemed unclear, so here's a video to make up for my inadequate description.

That was all the prep work- ugg. I hate prep work, but it was so worth the effort for the results I got. Next, apply a thin layer of primer, and two to three coats of paint. I used Behr's Ultra Premium Plus, which has a primer built into the paint (which equals less coats and better coverage.) Note: It doesn't have oil based primer built in, just latex. You'll still need the oil based primer first.

After everything is dry, run a razor blade along the crack between the wall and the trim. The last thing you want to do is take of the tape and have the latex come rip off in small chunks.

That's it!

On another note, we started a bathroom renovation. Like a full scale "strip everything down to the studs and replace everything but the plumbing and electrical" type of reno. We're excited! There's no fun pictures of this one, since my husband just finished taking out the icky plastic shower insert with a saw. It's very much in demo mode at the moment.

Happy Thursday!

January 14, 2011

Bathroom Vanity Makeover


When I painted the main bathroom last spring, I intended to sand and re-stain the vanity a dark espresso color. That never happened. I don't know why, but I'm intimidated by stain- it might have something to do with the fact that I've never done it, and am more comfortable with paint. With that said, I found some inspiration to darken our vanity on one of my favorite blogs.

I'm supposed to be priming and painting the trim in our hallway this week. We're painting all of the woodwork in the main open area of our house white this spring (since the $2400 quote had our jaws dropping). This project feels rather daunting, so what better way to procrastinate than by doing other, much simpler and less time consuming (and instantly gratifying:), house projects. A can of paint later, bada bing bada boom and the vanity is done.


(I updated the full-on shot... that's why the accesories are different:)
Like I said earlier, we're eventually planning on re-doing this bathroom. However, that project seems like one of those that is always assumed, but never actually comes to fruition. We'll see. The dark brown paint (Betsy Ross House Brown by Valspar- I completely copied Centsational Girl's paint choice. Imitation is the best form of flattery?) makes the vanity look more furniture like. I'm also liking the creamy marble-ish looking counter better. Contrast is a good thing. This project took a couple of hours (spread over three days), and cost $15. Not too bad. Here's what you need:
  • Paint with some type of glossy finish (anything from satin on)
  • Oil-based primer (Zinsser works wonderfully!)
  • Painters tape
  • Old rags
  • Fine grit sanding block
  • Dry wall repair
Start by taking the doors and hardware off (I made sure NOT to throw away the hinges this time!). Lightly sand all of the surfaces down, and wipe up all of the dust with old rags. Make sure to get all the dust off so your primer sticks well. If there are any cracks, holes, or divots in the wood, fill them will the dry wall repair. Let it dry and sand.Tape off all edges that need protection from paint.

Now prime away. Once the primer is dry, add your first coat of paint. I'll admit I picked the wrong color at first (it looked more brownish green in our bathroom than brown) but tried to have an "I already spend the money on this paint and it's good enough" attitude. Thankfully my husband persuaded me to spend the extra $15 bucks and 60 minutes to rectify this. He' gives good advise.

Depending on your quality of paint, you'll probably only need two coats. Let the doors and vanity frame dry, reassemble, and voilĂ ! New vanity.


Much better. Can you believe we stuck with this icky orange wood for so long?

January 10, 2011

Photoshop Decor Mock-up

Thought I'd share a quick "decorating" tip that I use frequently. Sometimes I have an idea of some kind of house project that I'd like to do, but am unsure about the results (ie. would that room look good with an accent wall? would a bench or console table look better in the entry way? would hanging curtains in the basement look weird if the couch can't be centered under them?) The hard way of answering these questions is to paint the accent wall, buy the console table, or hang the curtains only to realize that actually you don't like the end result. Trying out different options until they fit (even if the items can be returned!) wastes time and money.

I've started using a better solution- mock up a virtual photo of your idea in Photoshop. Here's how:
  • Take a picture of the room you're working with, and upload it into Photoshop. Try to take photos from a couple of different angles.
  • If you're curious as to how a new piece of furniture, a lamp, or certain accessories would work in that space, find a similar picture of what you're looking for online. Copy and paste that picture into a new Photoshop document, and use the magnetic lasso tool to select only the item you're considering in that image. Then cut that image, paste it into your room photo, and drag it to size. Place it where you want in the room.
  • For an accent wall (or different wall color), just select each wall and fill it in with that color. This obviously won't give you an exact idea, but it can help.
  • If you're trying to decide between a couple of different things in the same space (ie. which style lamp would look best on an end table) put them all into your room photo on different layers, but in the same place. You can then turn on and off layer visibility for a "quick change" of lamp style to see which you like best.
Sorry for all of the Photoshop lingo. I'm sure this works with other editing software. This is the mock up that I made for our bedroom in July. At this point, we had different lamps and no frames above the bed. I tried a couple of different combinations, and liked this best.


As I posted earlier, I've come pretty close to the mock up. I'd love find a bench, but no need to rush:) Here it is again:


This corner is empty in our room currently, but here's what I'm going for eventually:


I know that's a really crappy job of mocking up the photo, but it gives a good general idea. Hope this helps!

January 8, 2011

New Year, (Extra!) Clean House


Something about taking down Christmas decorations and the tree always makes me want to kick start spring cleaning four months too early. Maybe it's because the house feels back to normal and less cluttered. Who says you can't have "New Year" cleaning instead? This past week I've been thoroughly cleaning our home. Not just the regular vacuuming, moping, dusting, cleaning the bathroom and kitchen stuff, but actually taking the time to do those "I really should clean that but no one's going to notice/it only needs to be done once or twice a year" type of things. My goal is to do this for every room in the house this month, so that I've got an organized and clean palate to work with.

Sound daunting? Honestly, it's not. Take it room by room, one day at a time. Last Sunday I cleaned the living room. This included the normal:
  • Vacuuming
  • Dusting
  • Picking up and putting away random stuff that accumulates
I added a few more items to the list, and it MAYBE took an extra 15-20 minutes
  • Vacuumed those awkward places never get vacuumed on a normal day (ie. under the couch, behind end tables)
  • Vacuumed couches
  • Dusted the top of the bookcase, railing, etc.
  • Washed pillow covers and throw blankets
It hardly took any extra time at all.

Another idea to make cleaning more enjoyable: Get cleaning products you like! I found this great smelling natural cleaner at Target. This sounds weird, but I'm actually excited to clean my kitchen and bathroom with it since it smells so yummy. Hey, whatever helps.

January 7, 2011

I love lamp.


Really, I do. A lot. I am unusually excited about lamps, two specific ones in particular.

I've been looking at new lamps for our nightstands for a long time (we had two IKEA desk lamps up until now. They were fine, but didn't fit the scale of our room or furniture well). A few weeks ago I saw a lamp at HomeGoods and just knew that it was THE ONE ( :D ). Do you ever see something and know it is EXACTLY your style and EXACTLY what you want, and then everything else is compared to that thing, but falls short? How lame that I feel like this about house items. Unfortunately, there was only one lamp. I snapped a picture with my phone, searched online, called other Home Goods, but no luck. I kept thinking about that lamp and how great it would work in our room, (is it unusual to think so much about a light source?) but figured I'd have to look for something else since the lamp had no match.

Mom and I went back to HomeGoods a few days ago and found the same lamp on clearance (woohoo!) AND were able to track down a match at another store. So exciting! What are the odds? I love that God cares about even insignificant things that concern his children (like lamps!)- I felt so thankful that He orchestrated even a little thing like finding these! So here they are. I think they give our room a more "swanky hotel" vibe. At least it looks that way in person :)


Here's the before and after. Improvement, no?

Before: (this is RIGHT after we moved in last year)


After:


Much better. Still need to put real art in those frames!


Yay for new lamps!

January 3, 2011

Mini Painting Project

My husband and I painted our basement, including the woodwork, last January. We have a built in cupboard, and for whatever reason, back then I thought it'd be a good idea to leave the doors off and go for the "open shelving" look. It turned looking crappy, unfinished, and Leo would occasionally run off with and shred a roll of paper towels I'd been storing in there.

So that was a year ago. I've been meaning to paint the doors and put them back up ever since, and finally got around to it a couple of days ago. It was the first time in week where I had any energy to do anything (since being sick with a nasty cold) and of course the most obvious thing to do with my burst of energy was to take the doors of of storage, clean, prime, and paint them. Duh. So I coughed and hacked and painted, and this is what I came up with:


Much better (besides the crappy photo- my camera's on the fritz :( ). Since taking the doors off last year, I accidentally threw away lost half of the hinges, so we ended up buying new ones. And new hardware. So this project really only took $20 worth of new hardware, 40 minutes of painting, and an hour or so (for my husband) to drill new screw holes and hang the doors. I'm so glad it's done!

December 30, 2010

On a non-decorating note...

Belated Merry Christmas (and early happy New Year!)!

I have a sister-in-law with a great sense of humor. She's a fan of this link, and I thought I'd share it with you all. There are thousands of hilarious pictures- brows around a bit :) I'm sure we all have a few we could add.

Hopefully a more house project-ish post will follow tomorrow. Between Christmas, cooking, and a bad cold, this blog has been a tad neglected. Yikes!

December 13, 2010

Burlap Bulletin Board


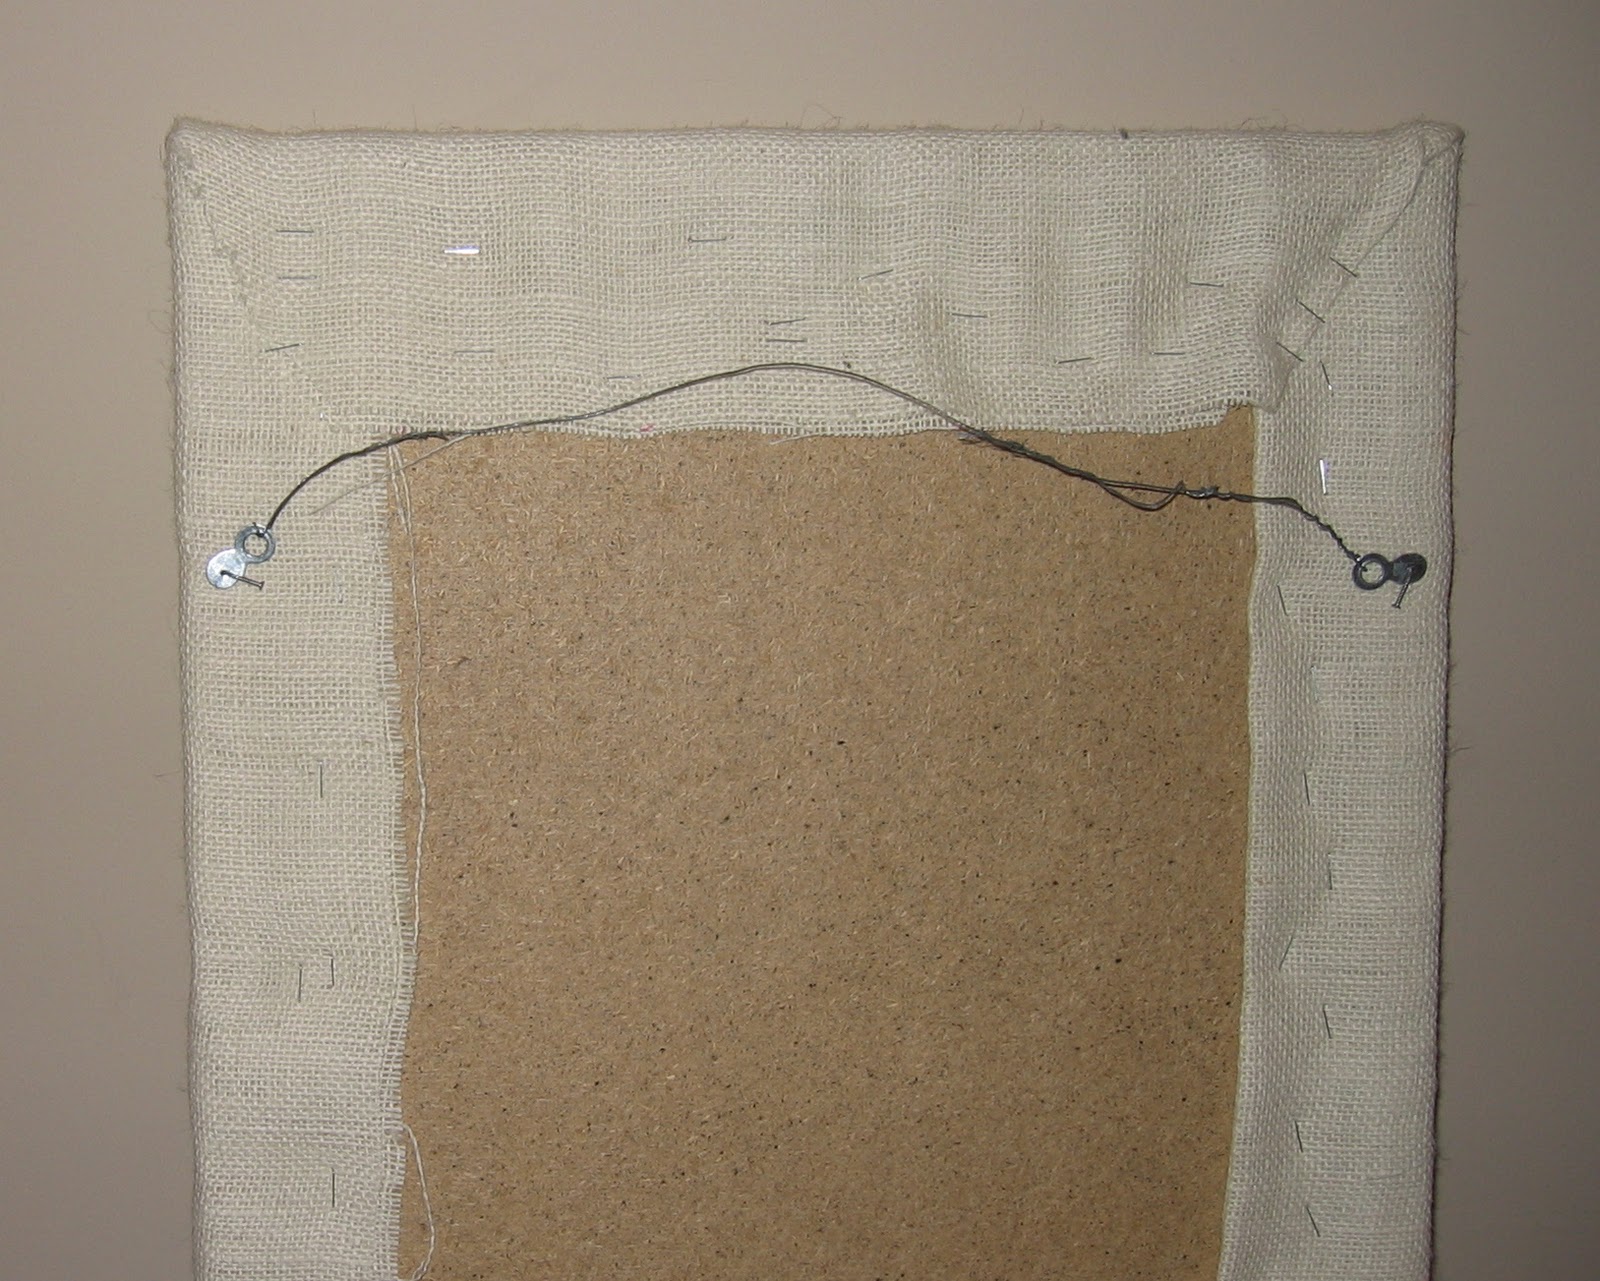
I've been seeing these burlap bulletin boards all over blogdom recently, and wanted to give one a try. It's currently hanging at the bottom of our stairs, but I'm thinking it'd look better in the office. This project is so easy. If you can staple, then you're set. Here's what you need:
  • Bulletin board
  • 1-2 yards of burlap (I used two, since the burlap's weave was so loose you could see through only one layer)
  • Stapler
Lay the board face down in the center of the fabric. Fold each edge over, pull taught, and staple. And keep stapling. I actually used a regular staples, not a gun, since the back of my board was cork. That's it! So easy.


I love Pottery Barn's use of a bulletin board as an Advent calendar (there's uses linen):


Happy decorating!

December 11, 2010

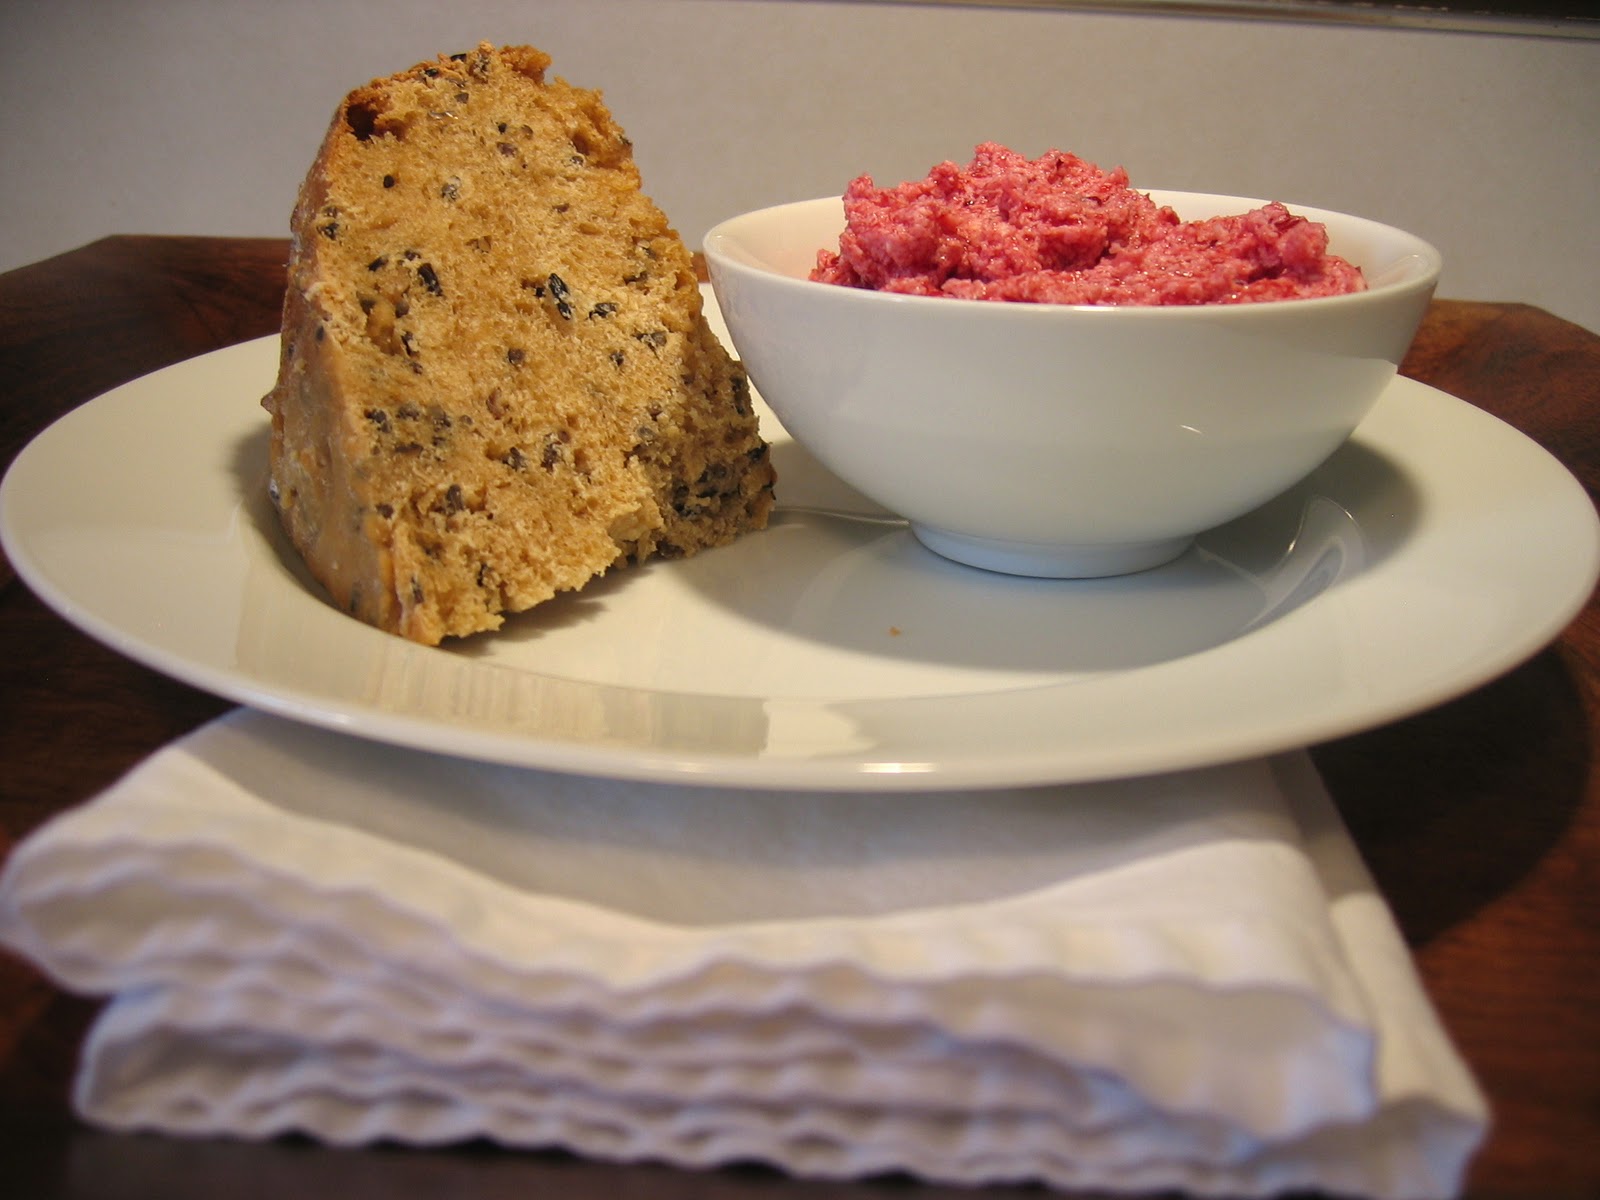
Wild Rice Bread with Whipped Almond Cranberry Butter


I realize this isn't decorating related. But food is just as exciting as decorating, so I suppose it's okay :) To celebrate our first anniversary this summer, my husband and I spend a long weekend at Larsmont Cottages on the North Shore. They've got this fabulous restaurant connected to it called The Ledge Rock Grille- I'd highly recommend it! Anyway, before the meal, our server brought out bread- wild rice bread with lingonberry butter. YUM! I found these two recipes online and tweaked them to my liking. Here they are:

Wild Rice Bread
  • 3/4 tsp active dry yeast
  • 1 cup + 2 tbsp warm water
  • 2 tbsp sugar, divided
  • 2 tbsp molasses
  • 2 tbsp vegetable oil
  • 1 1/2 tsp salt
  • 1/2 cups cooked wild rice
  • 3 1/2 cups flour
Dissolve the yeast in water. Add in 1 tbsp sugar and let sit for 5 minutes. Add in molasses, oil, salt, wild rice, and remaining sugar. Mix well and add in flour. Kneed for one minute. Cover and let rise for 1 1/2 hours. Punch down dough, cover, and let rise again for another hour. Shape into a large ball and bake on parchment lined cookie sheet for approximately 35 minutes at 375 degrees.


Whipped Almond Cranberry Butter
  • 1 stick butter, ( at room temperature)
  • 1/4 cup canned cranberries
  • dash almond extract
Place ingredients in medium sized bowl and beat together until well mixed and fluffy, 1 - 2 minutes.

                                                     Hah, looks a bit like raw ground beef- I promise you it's not.

I'm not a big "butter on bread" type of girl, but I must admit I've been slathering my wild rice bread with this butter concoction. Since it's mixed with fruit, it must not be THAT bad for me... right? :)


Recipe credits: wild rice bread, cranberry butter

December 6, 2010

Christmas (Tree) Leftovers


And I don't mean food- however, it's great too. We picked out and set up our Christmas tree on Saturday afternoon, and my husband sawed off the bottom few branches so that the tree could fit into our stand. Before he could throw them in the trash, I whisked them away to turn into more Christmas decor. What do you think?


I promise that this is the same bathroom- isn't it weird how wonky flash can make a paint color look?


There's still a couple of branches left in the garage. I'm thinking I might attempt to make my own wreath- we'll see if how it turns out.