September 29, 2010

Metalic Pumpkins


I absolutely love fall- the leaves turning, bonfires, a back to school mindset, taking out sweaters, jackets, and closed toe footwear, baking things with ingredients including pumpkin, apples, cinnamon, and nutmeg, and about 300 other things. Isn't it great that we get to decorate for a season? I suppose you can decorate for spring, summer, and winter (Christmas decor is separate!), but the fall months are the only ones that bring seasonal decor to our home. This year I've been mildly fixated on pumpkins. They're just so quintessentially fall. However, not that you have to be all matchy matchy, but we have no orange in our house and a lot of brown, green, and white. I kept the orange pumpkins mostly outside, and spray painted some mini ones for my kitchen table decor. I love the look! I completed this quick project for about $8. Here's what you need:
  • mini pumpkins
  • spray paint
  • painters tape
Not that directions are necessary ( :D ), but basically I just covered the stems with tape and sprayed away. Depending on which spray paint you pick, you'll probably end up doing 2 - 3 coats. Silver covered in almost one coat, bronze needed 2 or 3. The white pumpkins were grown that way... :)


Aren't they cute? I've seen all kinds of other pumpkin painting ideas: spraying them with chalkboard paint and writing messages on them in chalk, spraying them white and then drawing on henna-ish/lace designs with a black sharpie, leaving them orange and spaying them with a glaze spray, etc. I love these metallic ones because their coloring will be appropriate through Thanksgiving. Phew. Now my kitchen decor is in the clear until Christmas.


September 28, 2010

Simple Pillow Cover


I made this simple pillow cover this summer. It’s a basic style and works well with a lot of different types of decor. For my birthday, my husband bought me two of these pillows from Pottery Barn for our basement couch. I absolutely love them and wanted something similar in our living room, but wasn’t about to pay for two more. So, using the PB pillows as a jumping off point, I made my own. Here’s what you need for one 18″ pillow:
  • 1 yard of fabric (I used duck cloth- I wanted something with a linen texture, but wasn’t able to find linen thick enough. Also, my fabric was 60″ wide)
  • 6 – 8″ of fabric cord or thin roping
  • 1 large button
  • needle and white thread
  • 18″ pillow insert
Before doing any cutting or sewing, make sure to wash and dry the fabric. Cut the fabric into three pieces. Cut a 19 x 19 inch square, a 19 x 18 inch rectangle, and a 19 x 13 inch rectangle. Here’s what mine looked like.


Lay the 19 x 19 pieces down first. Fold the 19 x 18 pieces in half (its new dimensions are 19 x 9). Lay this piece on top of the square so that the fold is in the middle of the pillow running horizontally and so that it’s top two corners match up with the first layer’s top corners. Lay the 19 x 13 pieces on top of this matching bottom corners to bottom corners. Fold down a 1/2 inch flap on the top piece (19 x 13) and pin into places. Then pin together all sides of the pillow.


Here’s a closer shot of the flap and layers:


Cut the cord to your desired length. Mine was 6 inches. Using a needle and thread, sew the two ends of the cord together.


Measure to find the middle of the flap on the 19 x 9 piece. Here, sew the loop a 1/2 inch above the bottom of the flap. VERY IMPORTANT: Do not sew the loop to both layers of the flap! Sew it only to the top layer! If you sew the loop to both flaps, you’ll be able to see all of the stitches on the finished side of the pillow. Sew a straight horizontal line 1″ above the fold. This is optional, I like how it looks, but you can skip this step if you want. It’s time to sew the pieces to gether. Make sure that you have the three layers lined up correctly. The 19 x 19 pieces down first, topped with the now 19 x 9 flap piece, topped with the 19 x 13 piece (the loop will now be covered by the top piece). Sew around the entire perimeter of the pillow with  1/2″ seam. Here’s what it should look like:


Flip the pillow right side out, and it should look like this:


Put the pillow insert into the pillow cover, and then sew the button so that the loop fits snugly around it. I found it easier to do it this way because it’s hard to tell exactly where you’ll need the button to be without the insert in. There you have it! Pottery Barn looking pillows for a fraction of the cost. For my project, the buttons were actually the most expensive part of the pillow at $4.50 a piece. Here’s the actual Pottery Barn pillows from our basement…


…. and again, here’s the pillow I made for a fraction of the cost:


Happy sewing!

Living Centerpiece

Happy Tuesday! I thought I’d share one of my favorite projects (and by far the easiest!). I’m a huge fan of Candice Olson’s show Divine Design on HGTV- she’s got some great ides. On a recent show, Candice incorporated a very unique centerpiece- a large globe vase with flowers planted inside (yes, planted, not cut flowers). How cool? I’d been hoping to find a similar vase for a while, but wasn’t coming across anything big enough. A couple of weeks ago I ran across a huge fishbowl at a garage sale for $2.50. It was EXACTLY what I was looking for! Here’s what I came up with:


It’s so easy to make! Here’s what you need:
  • A large globe vase or fishbowl (mine is just under one foot tall by one foot wide)
  • Potting soil
  • Flowers (something tropical works best since there’s no drainage and it can be humid inside the vase)
  • Glass beads, rocks, etc.
I bought some clear glass rocks from Michael’s and layered them in the bottom of the vase. This helps with water drainage. Next, I covered the glass with a couple of inches of potting soil. Then in go the flowers. I chose to have mine completely encompassed within the vase, but I’ve seen this done with bulbs or an orchid which comes out the top. That’s it! Here’s a close up:


The flowers I used are begonias. I’ll be honest, the Bachman’s garden expert told me they wouldn’t do very well in this set up and to choose a tropical plant, but I loved their coloring and bought them anyway. The plant isn’t doing all that wonderfully at the moment, so if it dies I’ll take my own advise and update it with a tropical plant.


There you have it- a much longer lasting centerpiece than cut flowers. I must say it looks pretty awesome on our dining room table!

DIY Chalkboard

Here’s a project from back in June- I found a large picture frame with a chunky wooden (but kind of ugly!) frame for $2.00 at a garage sale and turned it into a chalkboard. Have a look:


Ours is hanging in the kitchen. I had the grand idea to write down the weekly dinner line up- this didn’t happen due to the “nails on a chalkboard” sensation I’d get while writing (ewwwww). So now I use it for writing down quotes and what not that I don’t mind having up for a while. Anyway, here’s what you need:
  • Large picture frame (with the glass)
  • Spray paint- look for a brand which covers wood well so the stain doesn’t seep through
  • Chalkboard paint- either spray (what I used) or in a regular paint can. One bottle of spray cost about $3.00.
Take the glass out of the frame and spray the front and back of the frame thoroughly you may need a few coats. Spray the picture frame glass with the chalk spray (you only need to do one side). I did a few coats here too, as the chalk paint looked blotchy. Don’t worry, it dries uniform. After both pieces are dry, put the glass back in the frame. Voila! You’ve got a super cute chalkboard.

Before and After Bathroom

In the spirit of inexpensive decorating, here’s a few before and after pictures from our upstairs bathroom. It’s amazing what a gallon on paint and a few Home Goods accessories can do. Here’s the before picture:


This was a snapshot of the bathroom my husband took at our house inspection (ie. WE did not pick this decor:) We’re planning to eventually remodel the bath, but I needed a mini makeover to tide me over until then. Here’s what…
  • 1/2 a gallon of sage paint ($32)
  • maybe 1/4 a gallon of white paint (free, we already had it)
  • 10 new door handles ($25)
  • a new towel rack ($17)
  • two candles and candle sticks (free, already owned)
  • and two new picture frames ($16 for both)
…did for our bathroom.


I think our $90 mini makeover will definitely tide me over until the real deal.

Inexpensive Changes for High Impact

Unless you’re professionally redecorating or buying furniture, a big visual change in a room can be achieved relatively inexpensively. Here’s some low budget yet big impact changes that are easy:
  • Paint! It is by far the easiest, biggest, quickest, and often cheapest change that you can make in a room.
    • I use Behr Premium Plus Ultra paint (it has the primer already built in, saving time and money). It’s a little more expensive up front, but you save time and money in the long run.
    • Don’t be afraid of using a bold color- if used properly it can be the focal point of the room and add drama and interest. If the color doesn’t work, the worst case scenario is you have to buy another gallon of paint.
    • Paint the woodwork. White trim, baseboards, and cabinets are popular right now, and most likely will be for a long time since the look is so classic. If you don’t like the color of your wood (or the shape that it’s in!) painting the woodwork immediately updates a space. Make sure to use an oil based primer, or the stain bleeds through.
    • Paint a piece of wood furniture. It’s amazing how a coat of white or black (or another color!) of paint can update a wooden piece. Look for pieces that have “good bones” or a classic shape and details.
  • Hang your pictures. Bare walls tend to look unfinished and unpolished, so try grouping frames together on a wall to create a gallery as a focal point. Some tips:
    • Use all the same frames (ie. black frames with white mats) for a cohesive look
    • Use different frames, but have a theme for the pictures (ie. black and white photos, old family pictures)
    • Fit the frame (or the group of frames) to the space. A small picture frame will look out of place on an expansive wall, but a large picture frame or a grouping of pictures will fill up the space much better. The opposite applies with a small space.
    • Change up your artwork. Switching out art and pictures from wall frames is an easy and cheap update.
  • Create or utilize a focal point. If you’re lucky enough to have one in your room, play it up! Windows and fire places are great ones. Photo galleries and wall art can work too.
  • Change up the curtains. This can make a huge impact in a room! Curtains are an inexpensive way to add color, texture, and softness to a room. JCPennys has a big window coverings department with a lot of reasonably priced options. If you’re looking for something even cheaper, Burlington Coat Factory has curtain panels for $7.99 each.
  • Consider lighting. It can change the mood of a room and create the look of either more of less space (which ever you’re going for). Add in a new lamp, or add in puck lights to highlight spaces or for task lighting (ie. my husband put them under our kitchen cabinets and also in a bookcase to showcase a picture gallery).
  • Change the furniture arrangement. By far the cheapest option:)
  • Add accessories. This is one of the biggest changes that you can make that makes the room look finished.If you want to change the look or mood of a room quickly without the mess of paint, changing the accessories works well. Some ideas:
    • Pillar candles
    • Woven baskets
    • Throw pillows
    • Stacks of books
    • Picture frames
    • Fresh flowers
    • Wall mirror
    • New curtains
    • Update table and floor lamps
That’s it, happy decorating!

September 27, 2010

Weekend Steals and Deals

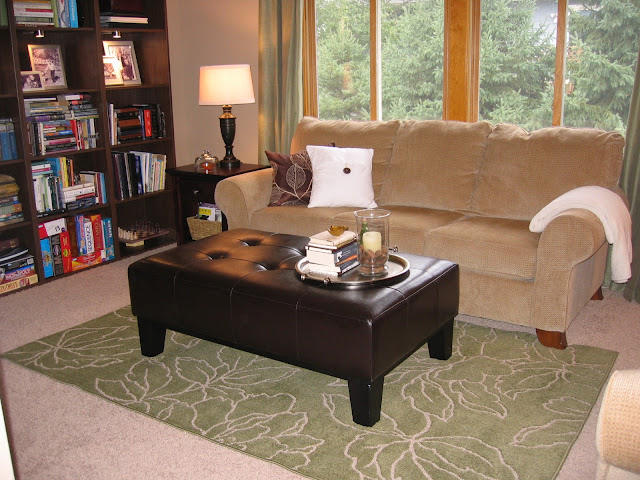
I hit a mini jackpot last weekend as far as super duper deals and clearance items are concerned. I’ve been eyeballing this area rug at Target for almost a year, but definitely would NOT pay $129 for it. This spring, I found it at a Salvation Army that carries new Target items for cheap, but it still was too expensive for my taste at $60. Finally, last weekend I spotted it on clearance for $32. Exciting? Yes! I snatched it up. Take a look:


And here it is in it's new home. My puppy has already pulled up a few snags already, so it might have to go back into storage until he's more grown up. It's so cute though, I might just keep it out and be diligent :)


Score! Mom and I also went to the North Oaks Rummage Sale . Most of the good stuff goes within a few hours of opening (an early 7 AM!). It’s held in a hockey arena, and the entire thing is packed with stuff. I found some great deals (however, I apologize for the crappy picture):


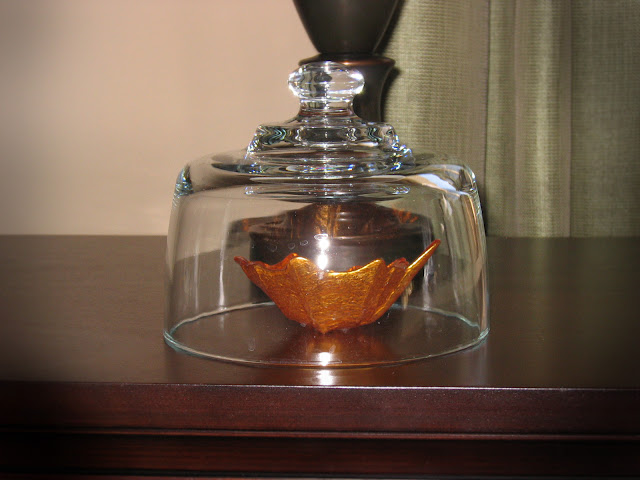
The glass cloche already has a home in my living room. The best part is, I'd been looking at them online for a while, and found this one for a buck.


Don't you just love a good bargain? :D

Tripod Lamp

I don’t usually spend my time daydreaming about light fixtures. However, after finding the coolest floor lamp ever, I started. It was a wooden tripod lamp, but at $379.99 (ridiculous!), this dream was not going to come true anytime soon. I figured I could make something that looked just as good for no where near that price tag. With the help of my husband (okay, he actually did all of it), we made our own tripod lamp that I like even better than the spendy one. Here’s what you need:
  • Wooden tripod (I found mine on eBay for $37.00)
  • Lamp kit / old lamp which can be disassembled and the lighting components reused (this is what we did)
  • Lamp shade

The metal tube that connects between the tripod and the lamp is actually a towel rod sawed down to size. When I bought the tripod off eBay, the wood was an orangy brown. I took it to a furniture refinishing shop and they stripped and refinished the entire thing for $35.00. Good deal! The greatest part of this lamp is that the legs are adjustable- it can be anywhere between 3 feet to over 6 feet tall. Since there are so many different types of tripods, lamp kits, and lampshades, play around with the pieces and see how they attach best to each other. Each homemade tripod lamp is unique!


Stair Gallery


(Note: I've updated some of the photos since painting the woodwork)

Here’s a mini project my husband and I finished up a week or two ago. We had a ton of frames we’d received as wedding gifts gathering dust in a downstairs closet. We’d just never gotten around to finding pictures or hanging them. I’ve always loved stairwell photo galleries, and we had a great (very blank!) one to fill up. Sadly, I don’t have a “before” picture- I always remember that I should be photographing my projects either right in the middle of them, or when they’re already done.


Here’s what you need:
  • A bunch of frames (I stuck with silver and black frames with white mats. You don’t have to do this, but it looks more cohesive I think. For more photo gallery tips and advise, see my earlier posting). Keep in  mind you can spray paint frames if need be. I did, can you tell which one? Didn’t think so :)
  • Big pieces of paper (or lots of smaller pieces taped together like I used. Newspaper would work well.), tape, and scissors
  • Hammer and nails
  • A level (if you’re picky)
It can be hard to envision where exactly each frame should go on the wall, especially since the frames are traveling up the wall along with the stairs. There’s no scientific method to figuring this out- I just cut out pieces of paper that were the same size as all of my frames and arranged them on the wall using tape to see which layout was best. Have a look:


It took a couple of attempts to get it right. I started with the biggest frame, put it in the middle of the layout, and then worked around it. The great thing about using paper cut outs is that there are no pesky nail holes to cover up if you switch your mind about where a photo should go. Also, I tried to keep a lot of the frames around eye level as you walk up the stairs- just something helpful to know. My handy husband put up all the frames, leveled them, and made sure that the spacing between pictures was at 3 inches :) Here’s the end result again:


I’m SO happy with the way it turned out- it really fills up the space!

I'm switching over from from Wordpress...

... and re-posting everything thus far (no worries, there have only been a handful of entries). I apologize for the repeat postings, I'd just hate to loose them! :)