
- 1 yard of fabric (I used duck cloth- I wanted something with a linen texture, but wasn’t able to find linen thick enough. Also, my fabric was 60″ wide)
- 6 – 8″ of fabric cord or thin roping
- 1 large button
- needle and white thread
- 18″ pillow insert

Lay the 19 x 19 pieces down first. Fold the 19 x 18 pieces in half (its new dimensions are 19 x 9). Lay this piece on top of the square so that the fold is in the middle of the pillow running horizontally and so that it’s top two corners match up with the first layer’s top corners. Lay the 19 x 13 pieces on top of this matching bottom corners to bottom corners. Fold down a 1/2 inch flap on the top piece (19 x 13) and pin into places. Then pin together all sides of the pillow.

Here’s a closer shot of the flap and layers:

Cut the cord to your desired length. Mine was 6 inches. Using a needle and thread, sew the two ends of the cord together.

Measure to find the middle of the flap on the 19 x 9 piece. Here, sew the loop a 1/2 inch above the bottom of the flap. VERY IMPORTANT: Do not sew the loop to both layers of the flap! Sew it only to the top layer! If you sew the loop to both flaps, you’ll be able to see all of the stitches on the finished side of the pillow. Sew a straight horizontal line 1″ above the fold. This is optional, I like how it looks, but you can skip this step if you want. It’s time to sew the pieces to gether. Make sure that you have the three layers lined up correctly. The 19 x 19 pieces down first, topped with the now 19 x 9 flap piece, topped with the 19 x 13 piece (the loop will now be covered by the top piece). Sew around the entire perimeter of the pillow with 1/2″ seam. Here’s what it should look like:


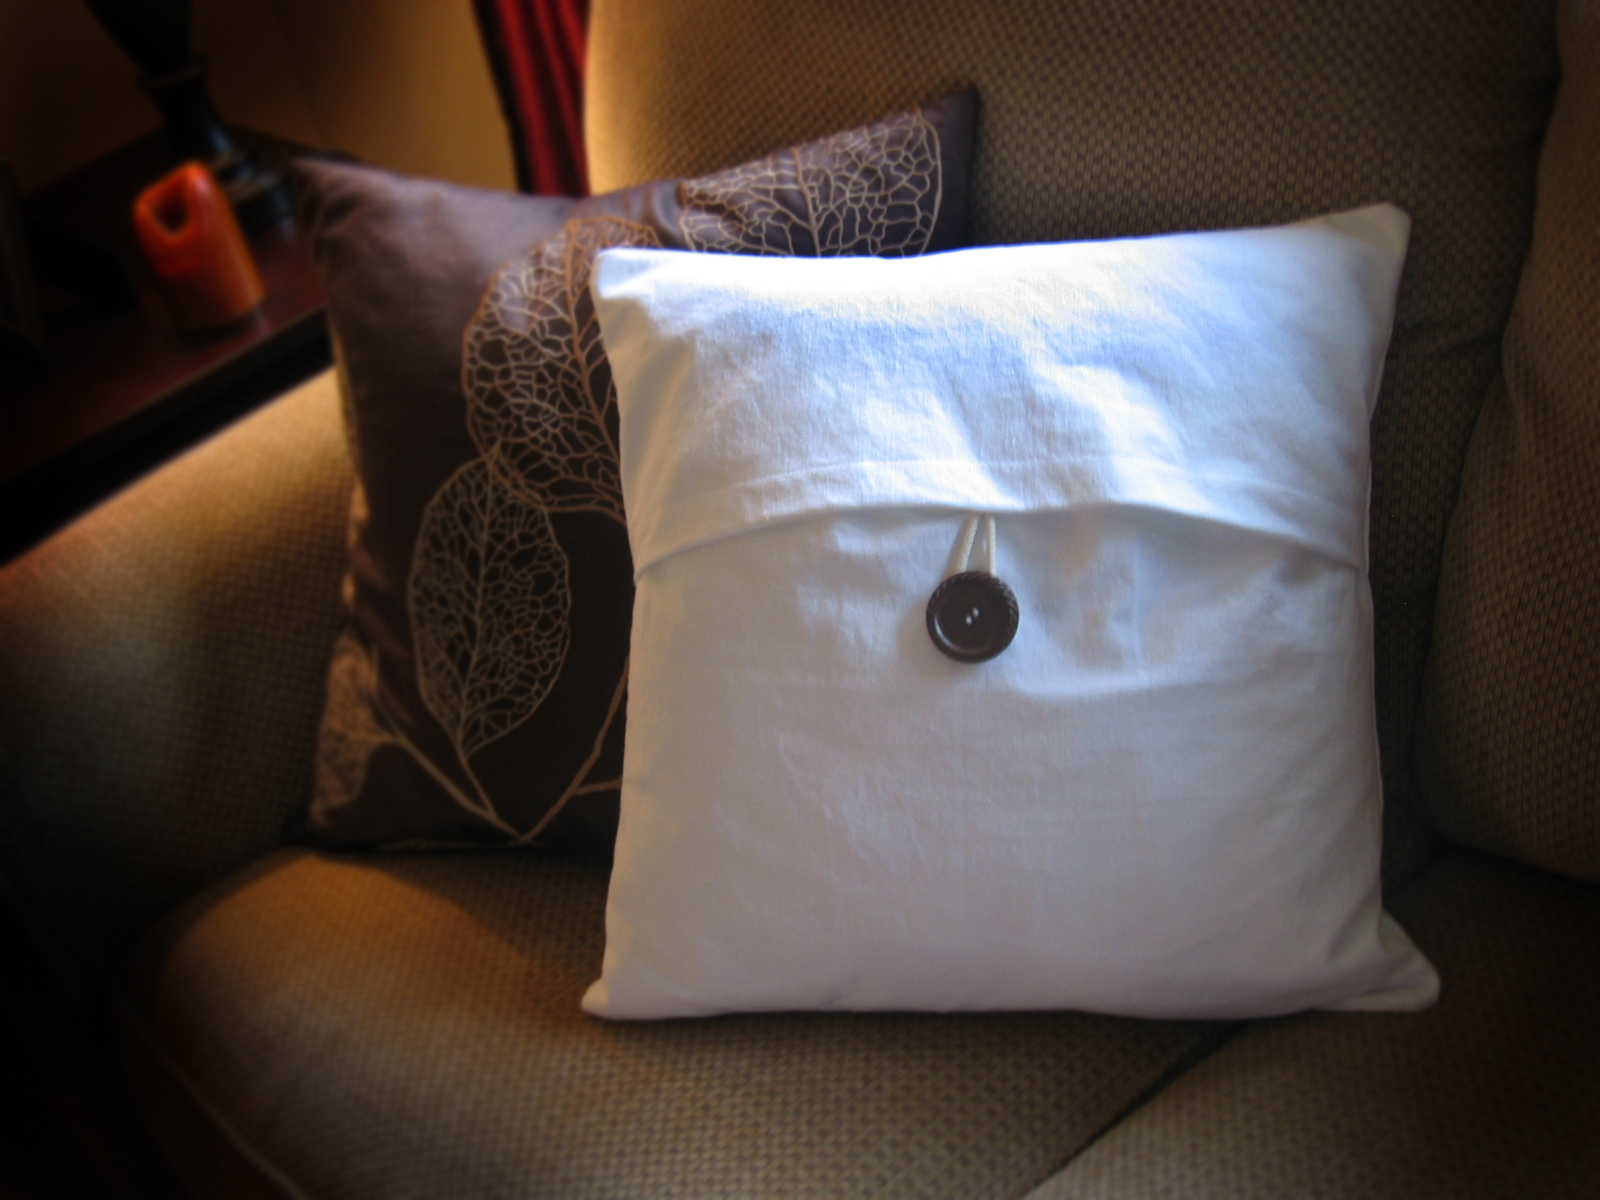
Put the pillow insert into the pillow cover, and then sew the button so that the loop fits snugly around it. I found it easier to do it this way because it’s hard to tell exactly where you’ll need the button to be without the insert in. There you have it! Pottery Barn looking pillows for a fraction of the cost. For my project, the buttons were actually the most expensive part of the pillow at $4.50 a piece. Here’s the actual Pottery Barn pillows from our basement…

…. and again, here’s the pillow I made for a fraction of the cost:

Happy sewing!
No comments:
Post a Comment
Note: Only a member of this blog may post a comment.