Sorry it's been so long since I last posted. We've HAVE been project-ing around here, but there's been nothing to show for it until today.
When we moved in, all of the trim in our house was a dated orangy oak color. It's fine, but not my taste. In every room we've painted, we've painted the trim white. I just like the look of it better. Our living room/ dining room/ entry way/ hallway are all connected, so I've been hesitant to paint the trim in ANY of these rooms, because then I'd have to paint the trim in ALL of them (for cohesiveness sake, of course :) We got some quotes to have it done professionally since this felt like such a big project (and included a massive railing with spindles. Has anyone done this before? I'm intimidated that I'll leave drips all over them). The lowest offer was $1,800. Are you kidding me? Yikes.
So we're doing it ourselves. At least, the trim. We'll probably hire out the railing since I just know I'll botch it if I try myself.
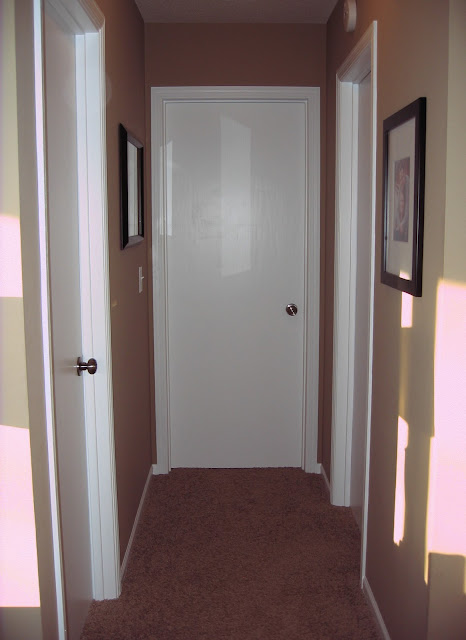
Here's the wonderful before shot:
Can you see I remembered just in the nick of time to even take a before pic? I always forget.
And here's the after:
Not sure why the sunlight looks red. Hmm. Much better, don't you think? I'm excited to tackle the rest of the trim. Okay, not excited about the prepping/painting part, but the look-it's-all-done part. We started with the hallway and will paint room by room so the entire main living area isn't in upheaval until mid May.
This project wasn't expensive, but took a lot of time. Here's what you need to paint your trim (well!):- oil-based primer
- white latex paint
- a good quality paint brush
- fine grit sanding block
- old rags
- paintable caulk
- painter's tape
- dry wall repair
- kitchen scraper
- PATIENCE!
Fill in any nail holes or dents in the trim with dry wall repair, let dry, and sand.
Tape of the walls and the floor. In order to help with trim paint not leaking onto your walls, press the edge of a plastic kitchen scraper into the corner of where the paint and the trim meet. This sort of "seals the edge."
Next, fill in any (and I mean ANY, big or small) cracks in the trim, especially in the seams of doorways with paintable caulk. If there's even a small (as in hairline) gap between the wall and the trim, or between pieces of wood in the door frame) fill them in. I didn't do for the other rooms I've done, and am already regretting it. It makes the paint job look a lot more professional.
The last step of prep is to put a small layer of caulk between the edge of the tape and the trim. Once the caulk is dry, it will create a barrier between the paint and the wall and you'll literally have NO drips/leak throughs. It's rather unbelievable. If you do nothing else, do this. That seemed unclear, so here's a video to make up for my inadequate description.
That was all the prep work- ugg. I hate prep work, but it was so worth the effort for the results I got. Next, apply a thin layer of primer, and two to three coats of paint. I used Behr's Ultra Premium Plus, which has a primer built into the paint (which equals less coats and better coverage.) Note: It doesn't have oil based primer built in, just latex. You'll still need the oil based primer first.
After everything is dry, run a razor blade along the crack between the wall and the trim. The last thing you want to do is take of the tape and have the latex come rip off in small chunks.
That's it!
On another note, we started a bathroom renovation. Like a full scale "strip everything down to the studs and replace everything but the plumbing and electrical" type of reno. We're excited! There's no fun pictures of this one, since my husband just finished taking out the icky plastic shower insert with a saw. It's very much in demo mode at the moment.
Happy Thursday!


No comments:
Post a Comment
Note: Only a member of this blog may post a comment.