January 28, 2012

House of Fifty online mag: Check it out!

There's a great online magazine that I've stumbled across called House of Fifty. Best yet, it's free! Here's the link to the Spring 2012 issue.

It's full of beautiful images (mostly house and decor related), recipes, blog spotlights, etc.

I've been saving pictures left and right from the spring issue, but there's even more in the Fall and Holiday 2011 issues as well.

Here's a couple fun ideas:


Is that not the cutest advent calendar you've ever seen? Very creative.


That focaccia bread is just calling to be baked and eaten. Yum! Go check the site out.

January 27, 2012

54 Tissue Paper Pom Poms


That's right. I made 54. And I may never fold one again in my life. But they certainly turned out cute! Here's some photos I snapped this afternoon after decorating for the Titus II Mentee Coffee that our church puts on every January:


And some other details:


January 3, 2012

Easy Heating Pad


Happy New Year! For Christmas, my thoughtful husband bought me a sewing machine. I've used it five times in the last week and a half, so I'm thinking it will get good use.

Here's a little project I whipped up last night: a rice bag heating pad. Do any of you use these? I use mine (one I purchased this fall) almost daily. It's wonderful. So wonderful I wanted to make some myself.

Here's what you need (for one rice bag)
  • Two rectangular pieces of fabric (pick whatever dimensions you want- I used 6 x 19). I used 100% cotton fabric from the fabric outlet down the street
  • Matching thread
  • 2 1/2 - 3 cups of rice
With the fabric inside out, sew three of the four sides together, leaving one short end open. Flip the bag right side out.

Fill with 1/2 cup of rice (more or less, depending on how full you want your bag). Smoosh all of the rice to the side of the bag and pin into place. This sounds confusing, so here's a picture:


Get the idea? Sew a straight line about 1/2 an inch away from your pin line, locking the rice in. Repeat this (fill with rice, pin the rice in, sew a seam) until you get to the last pocket. Your bag should be looking like this:


That's it! I had to get creative with my last finished edge (after the bag was full) and did this:


If anyone has a better suggestion, I'll be glad to hear it. Now go microwave your rice bag (for approximately two minutes) and enjoy the warmth!

December 31, 2011

Top 10 of '11

Happy New Years Eve! One of my favorite house related things to do at the end of the year is to look back at all that we've accomplished, and then to anticipate all those good ideas that WILL be accomplished this time next year :) It's rather exciting.

I am so thankful for a husband who has good taste and likes doing projects with me. I'm even more thankful (and undeserving) of a grace-giving and merciful God who has provided a home to be my creative outlet, and for using house projects to teach me much about contentment, stewardship, and joy in His provision. Who knew? I love that He orchestrates teachable moments where I'd least expect them :)

And on that note, here are my favorite projects for 2011, starting with my most favorite (or favoritest :)

It makes our entryway feel twice as big, and gives it three times as much style:) Leo also loves that the window blinds are now gone so he can bark at squirrels/people/trash blowing by/absolutely nothing.


This was a very close second. Much (blood?) sweat, and tears (and hand cramps) went into this one. It really brightens up our main living area!


I know this isn't a house project, but it's become a new hobby of mine! And isn't that couple darn cute together?


Transforming the "armpit of the house" gives the basement almost twice the living space- woohoo! (Ack- never took updated photos!)


I love this artwork! I also love that it was super cheap :) This project may strike again in the basement- I'm eyeballing an empty spot on the wall that looks like it needs some filling up.


We had 30 doors in our kitchen, and something had to give. Now there's 28.


This might be a weird pick, but I still love this little thing to death. I also may have picked this because it was the first time I got my newfangled DSLR camera to photograph the lighting properly. But just maybe.


One can of paint can make a world of a difference in updating a bathroom!


This pick cements my mild fixation with trees/branches/leaves. I need to branch out.


Rounding out the pack, this guy makes a lively and useful addition to our new office. 


11. And just for fun, let's throw in Homemade Strawberry Freezer Jam (just because of the copious and staggering amounts of sugar, and because I felt very much like Martha Stewart/The Pioneer Woman while I made it).


Happy (almost!) New Years!

December 25, 2011

Merry Christmas!

"...Mild he lays his glory by,
Born that man no more may die!
Born to raise the sons of earth,
Born to give them second birth!
Hark! the herald angels sing,
Glory to the newborn King!"

What a Savior we have! What marvelous love! My heart is filled with thankfulness tonight that Jesus Christ didn't leave me in my sin: He was born in a stable and died on a cross, all in order that he might give me new life in Him.

Can you believe it? This is the best news ever! "...for from His fullness we have all received grace upon grace." -John 1:16

December 23, 2011

A Christmas Wish Fulfilled


It's the official beginning to our Christmas celebration tonight! Charlie and I have always celebrated "our" Christmas together on the 23rd- that way we're able to make sure that we get some much needed "us" time amidst the various family celebrations. We cook dinner together, open gifts, watch Elf, and eat dessert. It's one of my favorite traditions.

One of the little things that I'm excited about this Christmas is that the railing is finally painted. Hence, the garland looks even better this year, with it's clean, crisp backdrop. I'm a garland girl. A tree is nice, but if forced to pick between the two, garland wins ever time.


The first time we ever set foot in our home, one of my first thoughts was, "This is a Christmas house." That sounds totally dorky, I know. But there were all of these prominent railings just screaming for lights and garland, and I could already envision a tree in the living room. I suppose I broke the golden rule of not imagining yourself and belongings in the house before it's a done deal.


But I did. And this year, the white railings and the garland and lights looks awesome, if I can say so. My "photographing things in low light" skills are not completely up to par, but you get the idea. It feels great to see a house project dream come to fruition two and a half years later.

Merry (almost!) Christmas!

December 8, 2011

Easy Christmas Decor: DIY Burlap Tree Skirt


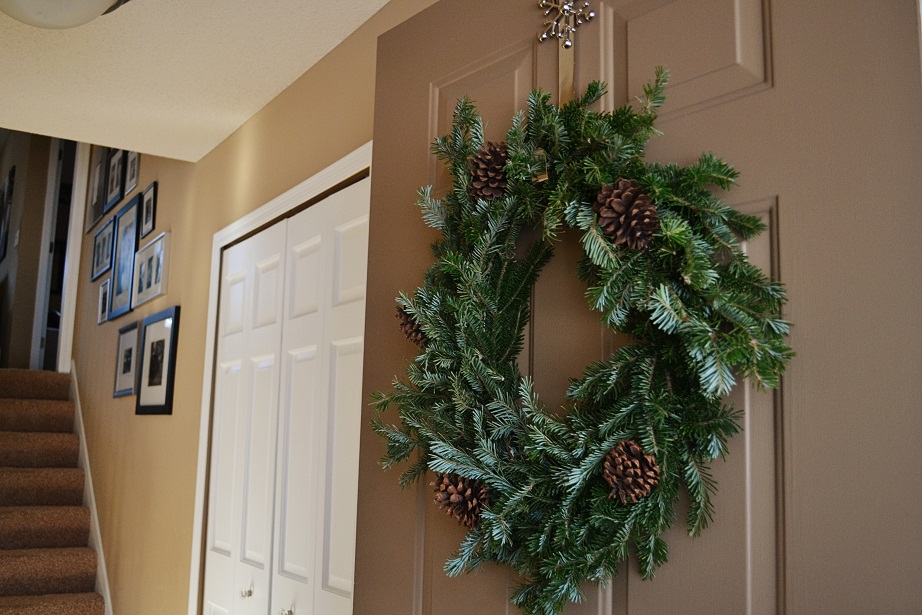
I've got another Christmas decor project for you: a burlap tree skirt. Like my wreath, this project was also a product of cheapness and laziness. And resourcefulness :)

We've got a big, red, satin tree skirt that I bought the first Christmas we got married. It's beautiful, but too big for our living room... and red just isn't me. I try to infuse red into my house around Christmas, but it just doesn't take. As Ziggy Marley so poignantly (hah) stated, "I've got to be true to myself."

So I made one out of things I already had on hand (read: this project didn't cost a penny!)


Yes, even though I like a coordinated house, I do love an eclectic Christmas tree. All of the random ornaments are like little memories hanging in the branches. We just hang the weirder memories in the back :) You know you do it too.

Here's what you need to create a super simple burlap tree skirt:
  • 2 1/2 yards (approximately) of burlap. It completely depends on the size you want your skirt.
  • 1 old curtain
  • Needle and thread
  • Decorative buttons
  • 1 yard of ribbon
Iron the burlap and lay it out flat. Draw two half circles, and cut them out. (My burlap wasn't wide enough to have one continuous piece- I sewed to halves together.)


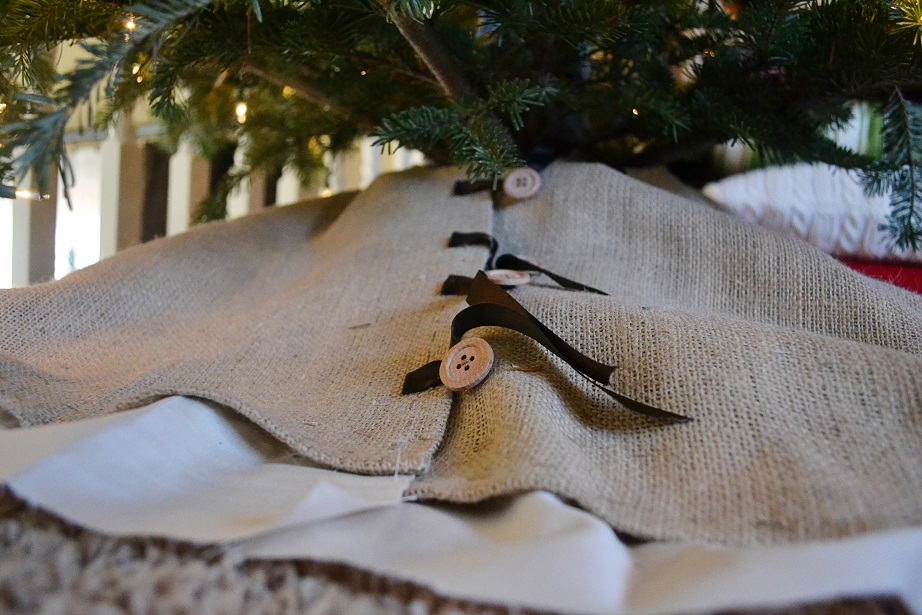
Cut a small hole (for the tree trunk) in the center of your fabric. I forgot to photograph this. Sew the two pieces of fabric together on only ONE side of the tree trunk hole. Pin, iron, and hem the other side, the circumference of the skirt, and the inner cut out for the trunk. See the above picture.


You should now have a very basic burlap tree skirt. I didn't want mine to be so plain, so I added a ruffle. I had some old curtain panels laying around, so I cut off a four inch strip off both sides (the long, vertical sides). Since each of these sides was hemmed, I ran a thread through the hem and pulled it taught, creating a ruffle. The pictures help to explain this:


(***It is also imperative that after laying out your curtain panel, you should have your most hairy friend come and lay on top of it. Just for good luck. And because he likes to be included in these sort of things.)


I then sewed my ruffle the the underside of the tree skirt.


I sat there forever sewing. My mom has a sewing machine (I don't), but I was too lazy to get in the car and drive over. So I sewed the entire thing by hand.


You can stop at this point, or add buttons and ribbon for a decorative closure.


That's it! Then photograph your tree, of course.


I'm posting this project on CentsationalGirl's Holiday Crafty Link Party- go check it out! There are currently 705 entries. Yikes!

December 7, 2011

Easy Christmas Decor: DIY Wreath


Maybe I lied- this is more of a putzy project than easy. Well, it's both easy and putzy. You get it.

Ever wonder what to do with those sawn off branches from bottom of the Christmas tree? Look no further. Instead of paying $18 for a Home Depot look alike wreath (or twice that much for a Boy Scout one!), you can make your own. I know $18 isn't expensive but I was feeling crafty and looking for ways to save money.


I'm embarrassed to tell you how I made this wreath: it was born from a mixture of laziness and cheapness on my part.

Here is the very basic tutorial I "followed." You'll understand those quotes in a second.

If you're making wreath the right way, you'll need:
  • floral wire
  • two wire coat hangers (or metal hoops)
  • fresh pine boughs
  • embellishments
If you're making the wreath the way I did, you'll need:
  • paper clips (yes, yes... I didn't have wire and didn't want to drive to the store)
  • one coat hanger
  • fresh pine boughs
  • hot glue gun
  • sticks
  • embellishments (I used pine cones)

Cut of 8" to 10" sections of the branches and bundle them together using floral wire (or paper clips:) I used three small branches in each bundle. Wrap the wire from your bundle around your wire frame to connect it. Keep going until the whole frame is covered, making sure to overlap each bundle with the next so your wreath doesn't look sparse. It took about 15 - 20 bundles to cover my wreath.

Since I only used one coat hanger, my wreath was pretty floppy. Embarrassing alternative number two: I found some sticks in the garage and wired them in to the back of my frame (you can't see them) to make the wreath more study and rigid.

Let's just call this being resourceful.

I hot glued the pine cones in and hung the wreath. There were a few parts where my stick frame could be seen, so I hot glued some more branches over the part, and no one one's the wiser. Except for you all, since I'm telling you.


I'm never buying a wreath again! And now you don't have to, either!