March 15, 2012

Bathroom Mirror Frame


I've finally framed the bathroom mirror. I say finally because I've wanted to do this for months and months but just never did. And it was super easy!

I searched Pinterest for DIY mirror frames (this blog was the most helpful), found that the style I liked best was a trumeau mirror (as opposed to a picture frame-like one with mitered corners.) And I'm also embarrassed to tell you that I've been calling it a truseau mirror until 30 seconds ago when I googled how to spell it, and realized it's trumeau, not truseau. Whoops.

Turns out a trumeau mirror is the easiest to make- most builder grade mirrors tend to be three by four feet. I was able to buy all of my boards in pre-cut lengths. I needed my two vertical boards a few inches shorter, and Home Depot cut them for me in-store.


For my three by four foot mirror, this is what I needed:
  • one 48" x 3 1/2" x 1/2" board (bottom)
  • one 48" x 6" x 1/2" board (top)
  • two 36" x 3 1/2" x 1/2" boards (sides (I had them cut down to 31 1/2"))
  • three 48" long decorative trim pieces
  • white paint
  • liquid nails
  • painters tape
Just a friendly FYI: I'm not usually loyal to any particular home center store, but Home Depot had NOTHING in terms of decorative trim (at least not what I was looking for). Lowes had a lot of options.

Also, I drew you a REALLY fancy picture in order to help explain myself:

I started out by painting my boards:


This is the inside of the unfinished laundry room. And Leo's fluff. Very glamorous.

I then used liquid nails to glue the trim to the frame boards. I glued one piece of trim to the bottom board, and two to the top board. This, obviously, is the bottom board:


After the trim had dried, I glued the bottom board to the mirror and let it dry over night. I then glued on the side boards, let them dry, and lastly glued on the top board. I'm sure you could do them all at once, but I decided to be cautious (for once). While the glue is drying, secure your board to the mirror using painter's tape. I forgot to take a picture of this.

You're almost done! Fill in any gaps with caulk. I haven't done this yet, but I betcha can't tell.


Go upgrade your mirror! You won't be sorry.

I'm linking this post up with Home Stories A to Z's linky party: go check it out!

February 28, 2012

A Sweater. Aha.

Just wanted to share that I now have something useful to do with all of Leo's hair. To think I've been vacuuming it up and throwing it away all this time...

Pinned Image
Photo via Pinterest

February 25, 2012

Have Your Plate and Hang it Too


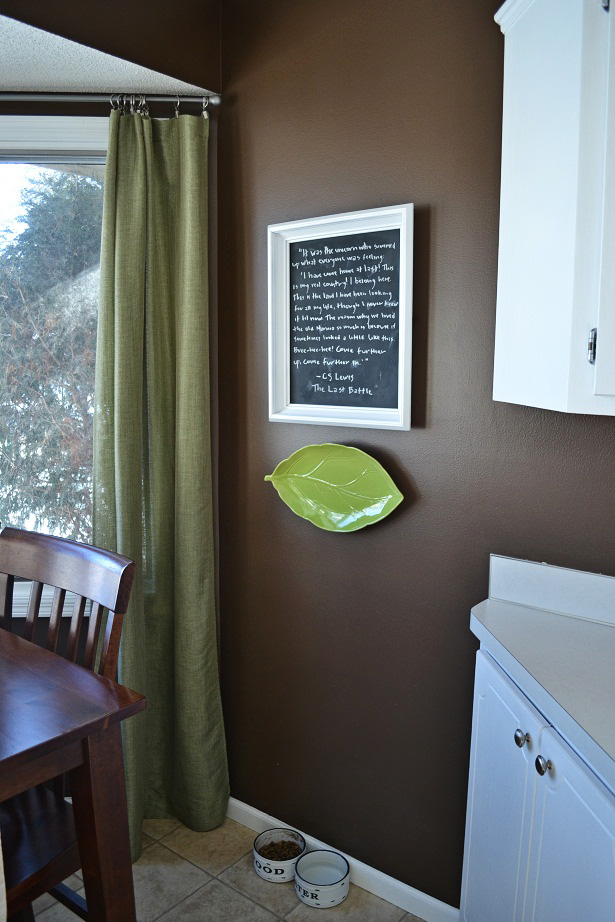
I want to share a quick tip with you. I've got this cute leaf platter that my sister in law bought us as a wedding gift, and wanted to hang it up on the wall without using any of those clunky metal plate holders. I ALSO still want to be able to use it for serving food . What's a girl to do? Enter these things:


They're really cheap, come in many different sizes, stick securely to your plate while still having the ability to come off without ruining anything, and mostly importantly, have a low profile. So I'm able to take my plate off the wall to use without anyone being the wiser that my plate hanging mechanisms are still in tact.

I'm sure you all loose sleep over this. But it's a neat little thing, and I wanted to share.


See? You'd never know there's anything there.


The platter has been hanging there since Tuesday, and the plate hangers are still sticking securely. I was half waiting for it to fall down and smash Leo's head while he eats, but I think we're in the clear.  :D

February 22, 2012

Cake Pops


Yum! I learned how to make these last week at my homemaking group (part of our church's Titus II ministry) and wanted to give them a try.


Here's what you need:
  • Box cake mix and required ingredients (water, oil, eggs)
  • Store bought frosting
  • Almond Bark Chocolate (or basically any quick melting/quick setting up candy chocolate)
  • Candy sticks
  • Embellishments (sprinkles, white chocolate drizzle, crushed up candy, etc.)
Make the box cake according to the directions. After it cools, slice it up into tiny pieces and scoop them into a large bowl. Stir/chop the cake until it is very crumbly.

Mix in approximately 1/2 to 1 cup of frosting. The amount of frosting depends on how moist your cake is. I used about 2/3 of a cup. You'll basically be rolling the cake/frosting mixture into cake meatballs, and want just enough frosting for the cake to hold together (but no more).

Freeze the cake balls for 20 - 30 minutes until firm. Make a pilot hole in each cake ball with your candy stick, dip the tip of the stick in melted chocolate, and put it into the hole. (The melted chocolate on the end of the stick acts like glue). Put back into the freezer for 5 - 10 minutes to harden the chocolate.

Melt the almond bark chocolate according to the directions on the package.* Dip each cake ball in the chocolate, making sure it's entirely covered.

Decorate, and you're done!

*FYI: If you're tempted to use regular chocolate chips, don't do it. They'll take a long time to set up and harden (ie. you'll be sitting at the table holding each cake pop for 20 minutes until the chocolate shell is hard enough to set down without denting/smudging). Also, I am chocolate chip melting impaired. I couldn't do it- I kept ending up with a large, hardened, smelly, burnt ball of unmelted chocolate. Does this happen to you? So chocolate chips were a no go.


February 21, 2012

State Art: Minnesota Love!


I've got a super easy (and cheap!) project for you: state art. Anyone seen these on etsy before? My guess is not... no one that I've told about this project has any idea what I'm talking about. Crazy DIY craft girl. I thought the idea was really cute, and wanted to give it a shot.

Here's what you need:
  •  Some type of blank surface (that was very vague... a canvas would work as well as an old picture frame or painting... or even a bulletin board. Paint it white and you're good to go.)
  • Wrapping paper in the color you want your state to be
  • Card stock for the heart
  • Glue or double sided tape
  • State template: To make a state template: I found a basic outline of Minnesota online. I copied it into publisher into a document the size of my canvas (2' x 3'), resized it until I liked how it fit on the page, and then brought the document on flash drive to Office Max. I had it printed out on a 2' x 3' document- this only costs $4.00. I cut out the state, traced it onto my teal wrapping paper, and cut my Minnesota out of the wrapping paper.
I found a beat up canvas print at Homegoods for $5.00 (SCORE!) and painted over it with a few coats for a blank, white surface. Here it is in it's whitewashing:


Woot woot! The painting wasn't actually too bad... I felt a little bad painting over it. After the paint dried, I attached my Minnesota cut out with scrapbooking double sided tape squares. Glue or double stick tape would work just as well. I attached the heart the same way.


This was so easy, folks! Since I didn't even glue on the Minnesota cut out, if I get sick of it in a year or two, I can peel it off and use the canvas for something else.


I'm linking this project up with Home Stories A to Z's Linky Party- go check it out!

February 17, 2012

Argyle Throw Blanket


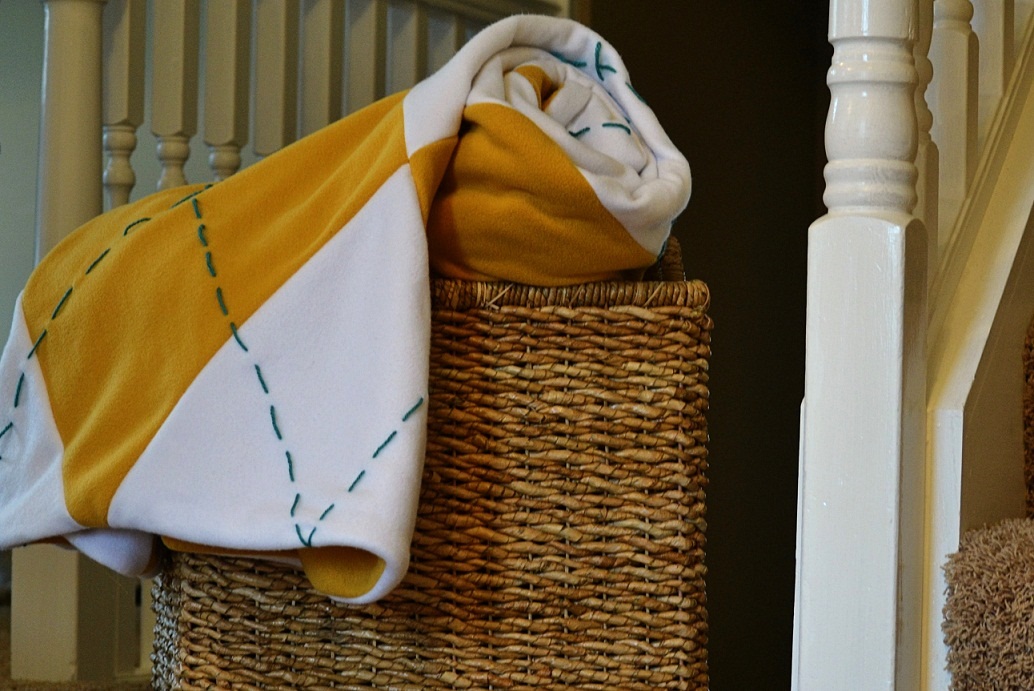
I sewed this blanket for Charlie for Valentine's Day. It had been six years since I made him one, and it was high time for another! I used this photo as inspiration, but made mine completely differently.

Here's a shot of the entire thing:


Isn't it cute? It was fairly simple to make. Here's what you need to make a 60" x 90" blanket:
  • 5 yards of yellow polar fleece
  • 2 1/2 yards of white polar fleece
  • Small ball of teal yarn
  • Yellow thread
  • Large eyed needle (one that the yarn will fit through)
  • Sewing machine, scissors, pins, etc.
To begin, I washed and shrunk my fabric. Then I made a template and cut out my pieces.

To make a template, I figured I wanted my blanket to have three diamonds width wise and height wise. For a 60" x 90" blanket, each diamond was 20 inches wide by 30 inches tall. Simple math is always a smart choice while sewing.

I cut my diamond template out of paper, and then followed it to cut out 9 yellow diamonds from the yellow. For the white, I needed 4 whole white diamonds, 4 half diamonds cut width wise (or the hamburger way if this language was used in your elementary school:), 4 half diamonds cut height wise (the hot dog way), and 4 quarters of diamonds. Just look at the large picture above if this sounds confusing. For the backside of the blanket, cut out a 60" x 90" piece of yellow.

I thought the easiest way to sew all the diamonds together would be to sew them in strips, like so:


Make sense? When all the strips were sewn, then I sewed the strips together. This part went pretty quickly. Here's what it should look like (mine is folded in half):


Now comes the putzy part. I laid my blanket out and sewed on the yarn. This is the part that gives it the most "argyle-ly" feel. The stitches should be in a straight line and should intersect in the middle of each diamond. (As you can see, mine didn't always land perfectly:)


This part would probably be easy with the right equipment. Between the size of the needle eye and the bulk of the yarn, I had to pull each stinking stitch through the fabric with a pliers. That's right. EACH STITCH. I needed the grip of the needle nose to simple pull it all through the polar fleece. So I'm game to hear if any of you have a better suggestion, because I'll take it.

Needless to say, this part was a bit time consuming. But it looked great in the end! When I'd finished the stitching, I pinned the argyle side and the plain side together (inside out, of course), sewed them together, flipped it the right way out, and finished the last foot by hand.


And once again, here she is in action:


I am linking this project up with Home Stories A to Z's linky party, here and here. Go check it out!

February 1, 2012

DIY Topiary


We've been having unusually warm (45!) weather for winter in Minnesota, so I've been slightly "springifying" our decor. I've been usually off schedule this past year: I was ready for Fall in July, Christmas in October, and now Spring in February. It's terrible.

I took down the winter decor (the Christmas stuff that wasn't explicitly Christmas- garland on the table, mini pine trees, snow flake votives, etc) on Monday and needed to replace it with something.

A topiary seemed to be just the ticket. Springy without being too "birds/blooming flowers/pastels." Here's what you need:
  • A small pot
  • Floral styrofoam square AND ball
  • Spanish moss (check your dollar store)
  • Sticks
  • Wire twist tie
  • Faux boxwood garland or picks (I bought faux garland at Michaels and cut off all the branches)
Start by cutting down the styrofoam square to fit into the pot. A serrated knife worked great for me. Then push in a couple of sticks.


And plop it in the pot to make sure it fits snugly.


Next, cover the styrofoam with spanish moss. Does anyone know if this stuff is real or not? Probably a stupid question, but I honestly couldn't tell. Well done, Dollar Store!


Now comes the putzy and time consuming part. Cover your styrofoam ball with all of your boxwood branches. This took me two hours. I made my own picks by deconstructing a plastic boxwood garland from Michaels. My guess is that if you used wire based pics, it would go a lot quicker. (Mine occasionally fell out as I was working, and it took forever just to cut the branches off and then cut them down to size. Ugg. But as someone wise once said, "It's painful to be beautiful" (or crafty)).


Leave a little bit of the ball uncovered (less than is pictured in the photo), and push it onto your sticks. I used one big stick and three little ones- I twisted the smaller sticks around the bigger one, and secured them to the big one with a twist tie.

Here she is!


I thought Charlie would think it was totally weird, but he actually likes it. Yay!


Go make yourself one!


I'm linking this project up with Home Storie's A to Z's linky party: go check it out!

January 28, 2012

House of Fifty online mag: Check it out!

There's a great online magazine that I've stumbled across called House of Fifty. Best yet, it's free! Here's the link to the Spring 2012 issue.

It's full of beautiful images (mostly house and decor related), recipes, blog spotlights, etc.

I've been saving pictures left and right from the spring issue, but there's even more in the Fall and Holiday 2011 issues as well.

Here's a couple fun ideas:


Is that not the cutest advent calendar you've ever seen? Very creative.


That focaccia bread is just calling to be baked and eaten. Yum! Go check the site out.

January 27, 2012

54 Tissue Paper Pom Poms


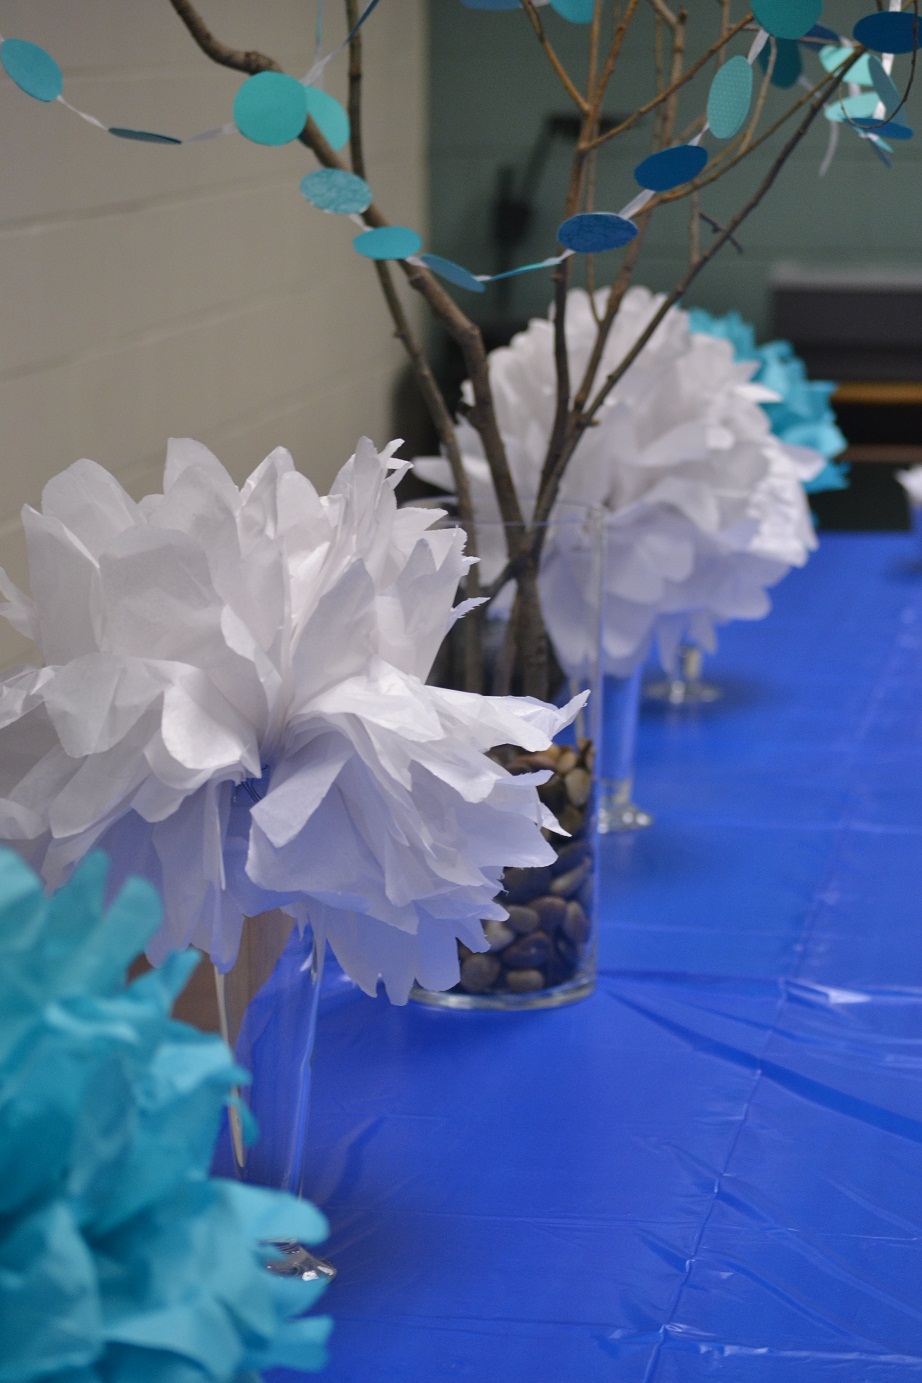
That's right. I made 54. And I may never fold one again in my life. But they certainly turned out cute! Here's some photos I snapped this afternoon after decorating for the Titus II Mentee Coffee that our church puts on every January:


And some other details:


January 3, 2012

Easy Heating Pad


Happy New Year! For Christmas, my thoughtful husband bought me a sewing machine. I've used it five times in the last week and a half, so I'm thinking it will get good use.

Here's a little project I whipped up last night: a rice bag heating pad. Do any of you use these? I use mine (one I purchased this fall) almost daily. It's wonderful. So wonderful I wanted to make some myself.

Here's what you need (for one rice bag)
  • Two rectangular pieces of fabric (pick whatever dimensions you want- I used 6 x 19). I used 100% cotton fabric from the fabric outlet down the street
  • Matching thread
  • 2 1/2 - 3 cups of rice
With the fabric inside out, sew three of the four sides together, leaving one short end open. Flip the bag right side out.

Fill with 1/2 cup of rice (more or less, depending on how full you want your bag). Smoosh all of the rice to the side of the bag and pin into place. This sounds confusing, so here's a picture:


Get the idea? Sew a straight line about 1/2 an inch away from your pin line, locking the rice in. Repeat this (fill with rice, pin the rice in, sew a seam) until you get to the last pocket. Your bag should be looking like this:


That's it! I had to get creative with my last finished edge (after the bag was full) and did this:


If anyone has a better suggestion, I'll be glad to hear it. Now go microwave your rice bag (for approximately two minutes) and enjoy the warmth!