September 30, 2011

Worship Music


Have you ever heard or sung the hymn "The Love of God" before? We've sung it a few times this year at church, and each time I practically have to hold back tears of gratitude for God and his incredible love and faithfulness. Here's my favorite verse:

Could we with ink the oceans fill
And were the skies of parchment made
Were every stalk on earth a quill
And every man a scribe by trade
To write the love of God above
Would drain the ocean dry
Nor could the scroll contain the whole
Though stretched from sky to sky

Isn't that incredible? I'm one who often needs a mental picture in order to grasp a concept. What a clear one! And what an infinitely amazing and loving Savior we serve!

My mom showed me a fabulous website, Sovereign Grace Ministries, where you can download and print free worship music- guitar tab, piano music, or guitar chords (this is what I use- you can download the lyrics with the corresponding chords). Check it out!

September 24, 2011

Photoshop Actions: One Photo, Four Ways

Has anyone dabbled with Photoshop Actions since my last post on them? If not, you really should! I snapped this photo of Leo this morning and have been playing around with it a bit. This is the raw image with no adjustments.


Here are a few versions using various Photoshop Actions, all from thecoffeeshopblog.com:

"Velvet Cream"


"Sunny Pop"


"Vintage Storybook"

"Mocha Velvet"


Editing can completely make or break a photo. So go take some pictures, download Adobe's free photoshop trial, and start editing!

September 19, 2011

A Before and After: But Not Mine!

We were gone most of the day on Saturday celebrating Charlie's birthday. When we pulled onto our street on arriving home, this is what greeted us:


No, it's not ours. It's the neighbor's. While we were gone they painted their house smurf blue. That's right folks, if you want to mimic this color, it's Benjamin Moore Smurf Blue.

This really surprised us because our neighbor is pretty meticulous about his yard. It always looks fabulous (way, way better than ours), and this slip of the hand (or the paintbrush) just didn't seem to match up.

It turns out that they picked the color in the dark, hate it, and are now repainting. This info was given to me by the painter who is out there right now fixing it. I told myself not to mention the word smurf to him, but it just slipped out.

PS. Dear Neighbors, if you ever find this blog post, know that I commend you for taking the higher ground and paying to repaint. The neighborhood thanks you. :)

September 18, 2011

The Painted Railing


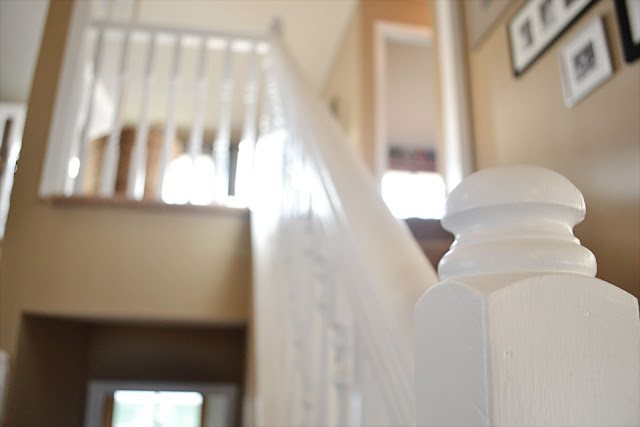
It's done! This is the second biggest project I've done so far. The first one, painting the kitchen cabinets, still takes the cake. But this one was a close, close second. Doesn't it look better?


Here's the before pics:


... and the after:


Last October, we were quoted at $2,500 to have the railing and all of the trim work painted in the main living area of our house. Are you kidding me? I said "NO WAY" and have been slowly working at it, section by section, since January. We've got one bedroom and three windows left to paint- the rest of the woodwork in the house is finished.

I'll be honest, this project was a ton of work. But 100% worth it in the end. There were some snags (the botched hand rail staining), but it feels great to be done. Well, practically. The whole thing needs some polyurethane, but it can wait.

If you too are contemplating painting your railing, here's what you need (and what you need to know):
  • Paint and primer. Surprisingly, not much of it. I probably used 1/3 of a can on Zinsser primer, and maaaaaybe one can of paint.
  • Dry wall repair and paintable caulk
  • Good paintbrushes (I used an 1 1/2" brush)
  • PATIENCE! And lots of it. And maybe 30 free hours to paint.
Start by wiping down the woodwork to remove any dust, hair, etc. This goes quick.

Tape off the carpet (I use duck tape and wedge it down into the crack where the woodwork and the carpet meet.) Tape off the walls, too.

Next, caulk ALL gaps and seams. Really, truly, this needs to be done. It's the difference between a professional looking paint job and a really crappy DIY one (which, is what you're doing- the DIY not the crappy part, but you want it to LOOK professional:). Caulking all gaps, seams and cracks (ie. where the hand rail meets the trim, the base of the spindles) ensures that the painting will look smooth and continuous.

Now bust out your smelly but glorious can of primer and paint away. This coat doesn't need to look good- crazy brush strokes are okay.

Now finish with two coats of paint. I love love love Behr's Premium Plus Ultra paint. It covers really well, and is pretty thick. Be VERY watchful for drips- I tried my darnedest to catch them all, but they still decided to show up. After both coats were dry, I chiseled them off with a putty knife type of tool and then touched up the spot with paint.

I'm not kidding when I say that this may have taken 30 hours- I didn't keep track, but it's probably a close estimate. My plan was to go slow and steady- I get very impatient and tend to start projects well and finish them sloppily. So, I'd spend time painting the railing (the spindles were the WORST!) in two hour chunks while listening to Christian talk radio. While I was self-inducing carpal tunnel, at least my soul was being fed:). I'm not kidding, it really was so encouraging!

I think the railing being white totally transforms the look of our home. I hated this project while I was doing it, but LOVE it now that it's done. And, now Leo matches the trim.

September 16, 2011

Linky Party: Fall Nesting

Hi Ya'll. (I'm not from the south, but that phrase seems to come into my brain a lot.) I've posted my Metallic Pumpkins DIY project over at The Inspired Room- you should go check out the Fall projects that others have posted. There are currently 138 entries!

PS. I JUST FINISHED THE LAST BRUSHSTROKE ON THE RAILING PROJECT! There's bad lighting right now, so I'll try to post some pics as soon as I get some GOOD ones. This is a momentous day, my friends.

September 9, 2011

Quick Decor Idea


One of my favorite centerpieces consists of branches in a large vase. It's fast, easy, and cheap (if you have a tree or a snaggle bush, such as us). I've been hacking off large branches all summer and putting them in a two foot fall fluted vase on our dining room table. The best part is, when the branches die after about 10 days, I just hack off some more.

I used this idea for our church's Titus II Mentor Coffee (I'm in charge of decor this year- woohoo!). Here's one of the larger centerpieces for the registration table. Aren't the berries pretty?


I didn't realize that my camera was in some funky setting. Pardon the slightly washed out images.

Go hack yourself some branches!

September 8, 2011

Catalog Living

For those of you who enjoy getting a Pottery Barn, Ballard Designs, or Crate and Barrel catalog in the mail, you'll find the spoof blog"Catalog Living" amusing. Here's my favorite:


...and a few other top contenders:


September 7, 2011

It's Fall, Ya'll


I know, not technically, it isn't. But come September 1st, it really should be.

When it comes to seasonal decorating, I'm a tad legalistic. I was just itching to get out the box under the house with "fall decor" scribbled across the top in permanent marker, but would NOT do it until September 1st.

I've got mixed feelings about this box. The first feeling is something along the lines of "OH BOY! There must be marvelous faux pumpkins and leaves in there!" And the second feeling comes after opening the box: "Well... there's not as much as I thought, but it's still pretty good." (Repeat this process with Christmas decor. Except we have a lot of Christmas decor, it's just never as fabulously wonderful as I'd remembered from Christmas past. Hindsight is 20/20?)

So the fall decor is making it's appearance in our house. Does anyone else love white (spray painted:) pumpkins as much as I do? I think not. I know that orange is a more natural-ish color, but white is a bit edgier and sophisticated.

In the spirit of fall, here's some decor inspiration pictures I found.


September 4, 2011

Walkies


This is our daily ritual, captured via my iPhone.

People often stop me on walks and say things like "Ohhhhh what a pretty dog! What kind is he?" Sometimes kids will ask to pet him, or, if they're farther away, will yell things to their friends like "GUYS! Look at that big white doggie!"

Today on our "walkies" (as our walks are known to Leo), we passed a bunch of kids playing on their swing set.

Kids: "Look at that dog! Let's shoot him!"

Kids making shooting noises: "Pew, pew pew pew pew pew pew!!!!!!!!!!" (Machine gun fire?)

This was definitely a new greeting.

September 2, 2011

Pinterest: A Confession


I'll admit that when I first joined this up and coming form of social media, I was skeptical. I was annoyed that I had to re-activate my Facebook account in order to log in (no offense at all to those on FB- this decision was for me personally), and couldn't figure out my way around the site.

But I stuck with it, and now I LOVE Pinterest. I have Pinterest Interest. :)

The photo above is the screen that greets me when I log in. Isn't it inspiring? For me of course. Because when YOU join Pinterest, you can fill your screen and pin boards with whatever images YOU find inspiring.

I love being able to collect and file the images and ideas that I love online! For some reason, I feel more organized being able to see ALL of my ideas on one page. Like somehow, they collectively make up a "Rebecca's Decor Preferences" aura or something, and give a wonderful, generic gist of what floats my boat.

But wait, it gets better. The best part of Pinterest is its search box. Boring, right? Wrong! Type in "white subway tile" and you'll get dozens (maybe hundreds!) of images having to do with said topic. It's a design idea mecca.

Pardon me while I gush.

But really, you should join too. It's just that much fun.