December 19, 2012

Piece of Candy

Oh my. Has it really been four months since my last post? My apologies.

Of course, the best thing to do after a long absence is to share a YouTube video. I thought I'd post one of my new favorites.


It's the kind that you watch seven times in a row, like this one, which is also a favorite.


If you don't find these funny, you need to adjust your sense of humor. 

August 1, 2012

Office Gallery Wall


I finished the office gallery wall a few weeks ago, and wanted to share it with you! This wall was originally blank and blah, and needed some (cheap) jazzing up.

I bought 11 frames at Goodwill for a grand total of $17.39. Yes, that's right. They have color coded tags, and all the blue tags happened to be $1.49 (two of my frames were $1.99- so much more expensive). The other three I already owned.

Check out your local Goodwill- they have a monthly calendar which says in advance which sales are on which days.


I hoarded gobs of blue sticker frames with terrible art in my cart like a wild woman. But wasn't it worth it?

Everything got a few coats of white spray paint, some cheap/free printable art, and went up on the wall.


The people who created some of these prints are so talented and creative! In recognition of their work, here's the image sources, if you're interested.

Mustard Seed Tree Print
Summer Stargazing Chart (free printable)
Minneapolis Cityscape
Hello Lover Camera Print (free printable)
Keep Calm and Click On Print (free printable)
Fruit of the Spirit Print (free printable)
Love Tree Stump Print (free printable)

A few are my photography/creations/old art/pages ripped out of an atlas :) Hey, use what you have.

I've been holding back on fall stuff for the first time in years. I'm usually ready for fall in July, and right now I'm just ready for more August and summer vacation. Enjoy the last month of summer!


July 16, 2012

The Kitchen

Woohoo! The kitchen is finished. It's actually been finished for a while, but I'm lazy about blogging :)


Since my last kitchen update post, we've grouted and switched out the light fixture above the sink. And Leo has some new pop-of-yellow dog bowls. Very big update, you know.

I love this fixture- it's so shiny and nautical/industrial. Definitely an upgrade from it's predecessor.


I switched out the art and the dog bowls. I wasn't sure if I'd like the green curtains with the new wall color, but I think they look good.


Here's the other side of the kitchen. I've been in a color pop sort of kick for a while, and am trying to infuse some into this room.


My grass was actually still alive when I shot this photo. Whoops.


My view while washing dishes. Except not anymore (the bushes are all gone- more on that project later).


The flour and sugar canisters got new labels, too. I was getting sick of the chalkboard ones.


There you have it. Out with the dark and cozy, and in with the airy and fresh.

July 14, 2012

Front Garden


Well... I've been rather MIA from this blog for a while. But it's summer, so I suppose that's okay.

We've almost finished the front garden we started last summer. I say almost because it's 92% done, and Charlie and I always have a hard time finishing that last 8%. Of any project. Either way, the plants are in (and have been for a while!). It's nice to be mostly done.


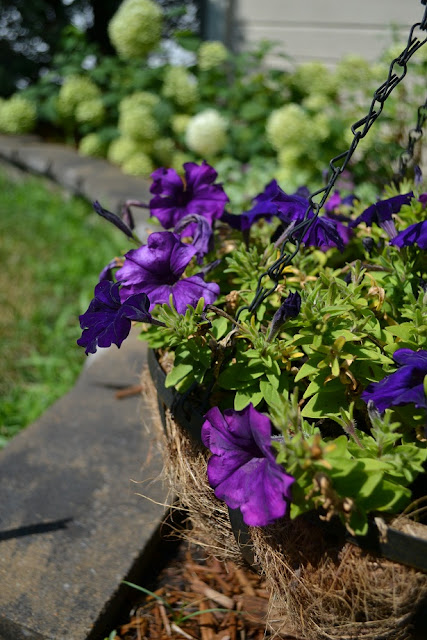
There are hydrangea (my favorite), boxwood, catmint, dead nettle, hanging baskets with purple petunias, a mini arborvitae tree, and tall white stalky flowers called larkspur (I think, lost the tag- someone confirm this?) that Charlie refers to as "the corn" since it looks a bit like a corn stalk.


Is this last one larkspur? I think so. Either way, apparently it attracts bees.

The catmint has quadrupled in size. It's taking over it's part of the garden, and I think I'm going to have to split EVERY plant, probably EVERY year. I love catmint, but it's a bit invasive.

Here was my original idea:


And here is what we did. I might take out the corn and put in alium (like in the photo above). I'm not in love with it, and it was cheap. Wasn't our grass nicer back in April? I suppose it IS always greener somewhere else.


There you have it. The front garden, almost done.

May 31, 2012

Kitchen Updates

I've been holding out on you. We've been doing some cosmetic kitchen updates, and I meant to post the finished product a few weeks ago. Except that we're still not done, so there's no "finished" photos, and instead of waiting till whenever that is, here's what we've got so far.


It's blue and tiled and has new lighting. Here's the before:


**Notice in almost all of my previous shots of the kitchen, I tried my darnedest to crop out the light fixture above the table. This fixture has been hated from day one- it looked like a rack of metal antlers with ugly lights protruding. Isn't the new one much better? It was a birthday present.


I love the bottom glassy/metel-ness of it. But I'm weird like that.


You know you've jumped head over heals into home ownership when your birthday list consists of things like Home Depot gift cards, cans of paint, light fixtures, etc.

It was Charlie's idea to put in the tile back splash. We finished 2/3 of the job last weekend (first time tiling, woohoo!) and we'll finish this Saturday. And hopefully grout.


You can see the wall we haven't finished yet. But doesn't it look better?


May 16, 2012

Recent Inspiration

It seems the ol' blog has been a bit neglected as of late. But the front garden hasn't! We're almost done and I should have some photos soon.

In the meantime, I've been playing Mario Kart Wii (with Charlie, an "I finished the first year of my MBA" gift to himself, (much more fun than anticipated!)) dogsitting, and spending way too much time on Pinterest. So here's some fabulous and inspiring photos. Enjoy!


Heather Garrett Design - bathrooms - silver, beaded, oval, mirror, espresso, bathroom, cabinet, vanity, shelves, white, vases, black & white, art, small bathroom, small bathroom design,

Painted Porch

Pinned Image


adorablelife:

la-belle-vie:

prettyworld:

White & Bright Kitchen

Goodnight.

May 9, 2012

DIY Roman Shade


I've got a great DIY project for you- make your own roman shade! Making your own shade is great because:

1. When curtain panels won't work in a space, a fabric shade beats mini blinds every time.
2. Having a custom shade made professionally cost anywhere between $65 (for really ugly ones with only a few fabric color choices) to the upwards of $1000.

Everything included, my shade came in at $50, and I was able to pick fabric that I loved.


Here's what you need:
  • Cheap, plastic mini blinds the size of your window (make sure the width matches, if the mini blinds are too long they can easily be shortened)
  • Fabric (how much depends on the size of the shade you're making)
  • Fabric glue
That's it! No sewing required if you don't want to or don't have a machine. Three side comments and then we'll get going.

1. If you do anything, make sure, and then doubly sure, and then triply sure that every single stinking part of your shade is square. No eyeballing things.
2. Don't use thick or heavy fabric.
3. Make sure your fabric is cut square. Wait, I already said that.

I say these things because this is the second roman shade that I made. The first one:

1. Wasn't cut square
2. Was made up of thick indoor/outdoor fabric

It hung all wonky and looked very homemade. After numerous attempts to fix it, I threw in the towel and started over.

Okay, enough ranting. But really, please do learn from my mistakes.

Start by letting out your mini blind and laying it out on the floor.


Carefully, locate and cut out all of the ladder cords. Do NOT cut the lift cord. The lift cord is what pulls the blinds up and down, and the ladder cord is what holds all of the slats in place. The ladder cord is thinner than the lift cord and resembles a ladder. Duh.


I was super paranoid about cutting the WRONG cord (cue horror music). This link (which I used as a tutorial) has more pictures of said cord, and could be helpful as well if you're OCD and paranoid about this like I was.

Pull off all of the slats except five (more or less depending on how many lifts you'll want in your shade).

Set your jumbled mess of deconstructed mini blinds aside, and get out your ironed, cut to size fabric. That's right, I'm assuming you've already done this.

*A side note: the width of your shade will be pretty standard (whatever the width of the mini blind you bough). The height is negotiable: I mounted my roman shade about six inches above my window to give the illusion of height. Add whatever inchage (like my new word?) you need. Of course, add an additional 2"-4" of fabric both height wise and width wise to your entire piece to incorporate a hem (I had a 2" hem on each side).

Here's my hemmed fabric.


You can either sew your hem in place, or you can use fabric glue. I sewed mine.


Now pull your deconstructed mini blinds back out, and glue the mechanical top to the top of your fabric, making sure the lift cords are hanging down. Make sense?


Evenly space out your slats on the fabric, and glue them down. Make sure that the holes in the slats are lined up with each other vertically, and thread the lift cord through.

Now get out the heavy bottom slat. Thread the ends of the lift cord into the holes in this slat, and tie a knot in each cord to secure it in place. The knot should hold the heavy slat in place. I totally forgot to take a picture of this. Whoops!

Glue the heavy slat one to two inches from the bottom (depending on how much you allocated for your hem). I obviously left too much fabric here.


And then glue the excess fabric up to hem.


You're shade is almost done! Now let it dry for at least 12 hours.

Follow the instructions that came with the cheap mini blinds for attaching it to the wall, and you've got yourself a custom roman shade.

Woohoo!

Here's my shade closed:


But mostly, it will be open.


There you have it!

April 27, 2012

Front Garden Ideas

Spring is here, and we've picked up the garden project again! We had four cubic yards of dirt delivered a week ago Saturday, so now all we need to do is:
  • finish the retaining wall
  • decide on plants
  • plant plants
  • mulch
I'm no gardener, so Mom's coming over on Monday to help. She's great with plants. In the meantime, I've mocked up a rough idea of what I'd like. Here it is:


I LOVE hydrangea- it's my all time favorite. Hopefully the garden will also include salvia, boxwood, allium, and some sort of mini tree to fill in the tall spot in the back. We'll see.

Some other potential outdoor projects for another summer may include:
  • painting the house (gray) and trim (white)
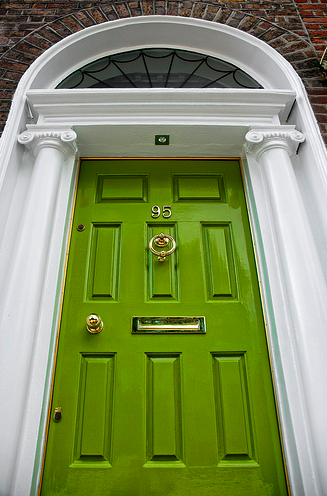
  • a new front door
  • different sconces
Here's a mock up:


I'm so excited to jump into this project and get it crossed off the list!

April 12, 2012

Life Recently

I've yet to photograph some more projects. In the meantime, here's some iPhone pics of life recently.

This picture is for Mom, who thinks our house is always so clean.


It isn't.

I've been paralyzed at the thought of buying the wrong shade of blue-gray. I spent too many hours narrowing down 16 paint chips to these here, and then ended up getting a different color entirely. Charlie's input: "They all look white." Thanks.


I still love my snugly buddy. This is part of our morning ritual:


My brother is awesome and created Giant Jenga. We played this a few months back (yes, not recent, but still cool).


Daniel shows the proper posture for self protection when Giant Jenga falls:


We've also got some of this stuff going up somewhere in the house... sometime soon. Very cryptic.


That's all for now, folks.