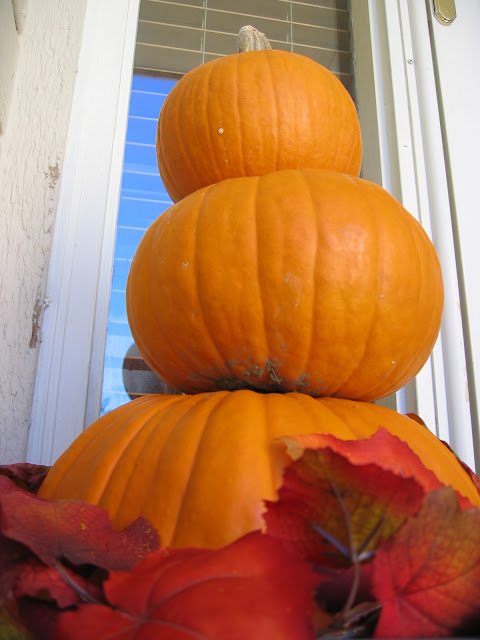
Happy October! I've completed another pumpkin project: a pumpkin topiary! This one's cheap and easy, too.
Can you see Leo checking out the topiary? :) Here's what you need:
- A couple of pumpkins in varying sizes. I found a big, medium, and small pumpkin. Look for ones that are "flat" on top, or have more of an oval shape as opposed to round. They'll stack and balance better.
- Some type of outdoor urn (or basket or flower pot). Mine was hunter green, so I spray painted it gray. I think I'm going to respray it, as "dark gray" turned out to be shinier and lighter than I was going for (anyone think it resembles duck tape? :)
- Leave garland
- Serrated knife or small saw
After spraying the urn duck tape dark gray, I filled it with and old bed sheet (yes, an old bed sheet, I'll admit it) and wound the leaf garland around the inside of the urn. In my case, the opening of the urn was bigger than the bottom pumpkin, and I needed something to cover up the bed sheet. Plus, even if you don't need any coverage, I think the garland is cute and whimsical. Then I sawed off the stem and plunked in the first pumpkin. Depending on the size of your urn, you may or may not need anything to fill in the bottom in order to lift up the bottom pumpkin. An old sheet worked well because I could wad it up to fit the contours of the bottom pumpkin so I could rotate it to get the flattest part facing up. This helped the other pumpkins balance well on top.
Here's a close up of the garland. Aren't the berries cute? FYI: As well a mild pumpkin fixation, I'm also finding I'm drawn to berries.
After getting the bottom pumpkin situated, saw off the second pumpkin's stem and add it to the topiary. Top it off with the smallest pumpkin and you're done!
Here's few other pumpkin topiary pictures that I used for inspiration:
I love the idea of carving the pumpkins (especially like in the second picture!) but wanted mine to last for a while. Once cut, the pumpkins seem to shrivel up and die within a week or so.


This is beautiful!!!
ReplyDelete